
Are you looking to upgrade your graphics card but unsure of how to remove it from your motherboard? Fear not, as we’ve got you covered. Removing a graphics card from a motherboard may seem daunting, but with the right tools and techniques, it can be a breeze. Think of it as removing a puzzle piece from a puzzle – you need to gently pry it out without damaging the surrounding pieces.
From detaching cables to unscrewing brackets, we’ll guide you through the step-by-step process of safely removing your graphics card. So sit back, relax, and get ready to level up your tech game.
Safety First
Removing a graphics card from a motherboard can be a delicate process, so it’s important to first ensure your safety. Before attempting any work, make sure to shut down your computer and unplug it from the power source. Wearing an anti-static wristband can also help prevent static discharge which can damage your computer’s components.
Once safety measures are in place, locating your graphics card and disconnecting it from the motherboard can be done by removing any screws or connectors holding it in place. Carefully remove the card from its slot, ensuring not to twist or apply too much force. With a bit of patience and attention to detail, you can safely remove your graphics card from your motherboard.
So, go forth and upgrade your hardware with confidence.
Shut Down Your Computer
Shutting down your computer is an essential process that should never be skipped. Not only does it help clear the system’s temporary files and give it a fresh start but also helps maintain its longevity. However, ensuring your safety should come first before shutting it down.
Before you turn off your computer, make sure you save all your work and close any running applications. Doing so helps prevent data loss and improves the overall system performance. Additionally, it’s advisable to disconnect any external devices like USBs and hard drives and turn off the power supply to prevent electrical surges.
Remember, by shutting down your computer correctly, you not only maintain its longevity but also ensure a healthy and safe environment for both you and your machine.
Unplug Everything
When it comes to electrical safety, one of the simplest yet most important steps you can take is to unplug everything. This is especially true during severe weather conditions, such as lightning storms or hurricanes. Power surges and electrical discharges can damage your appliances and electronics, or even worse, start a fire.
That’s why it’s so crucial to unplug any non-essential devices and appliances if you’re expecting extreme weather in your area. But it’s also a good practice to unplug items when you’re not using them, such as chargers, toasters, coffee makers, and other small appliances that can consume energy even when they’re not turned on. Remember, safety always comes first, and a little bit of prevention can go a long way in avoiding electrical hazards in your home.
Opening Your Computer Case
If you’re looking to upgrade your graphics card, the first step is to know how to remove it from your motherboard. The process can seem intimidating, but it’s actually quite simple. Firstly, you need to turn off the computer and unplug it from the power source.
Then, locate the PCIe slot where your graphics card is installed and gently push down on the retention clip to release it. Carefully grasp the graphics card and gently pull it straight up to remove it from the slot. It’s important to avoid touching the gold connectors on the bottom of the card as this can damage them.
With the graphics card removed, you can now proceed to install your new one. However, it’s always important to double-check the documentation or seek professional help if you’re unsure about the installation process.
Choose Correct Tools
When it comes to opening your computer case, it’s crucial to choose the correct tools. This task requires a bit of careful handling to avoid causing any damage to the hardware. One of the most important tools to have is a screwdriver.
However, not all screwdrivers are created equal. Make sure to choose a magnetic screwdriver to prevent losing screws. Another necessary tool is an anti-static wristband, which helps discharge any static electricity from your body to prevent damage to sensitive components.
Once you have these tools on hand, you can proceed to open the case. Remember to take your time and be gentle as you remove the screws and lift the casing. With the right tools and a bit of patience, you’ll be able to access your computer’s components safely and efficiently.
Lay Your Computer Flat
When it comes to opening your computer case, it’s important to take the necessary precautions to prevent any damage or injury. First and foremost, make sure to lay your computer flat on a stable surface to avoid any potential accidents. Once you’ve got your computer in a secure position, it’s time to open the case.
Most computer cases will have screws or clips holding the case in place, so be sure to locate and remove those before attempting to open the case. Once the screws or clips have been removed, gently slide or lift the case off of the computer, being careful not to disrupt any internal components. With the case safely removed, you can now access the inner workings of your computer and make any necessary upgrades or repairs.
Just remember to take your time and be mindful of your surroundings to ensure a safe and successful experience.
Remove Case Screws
To open your computer case, the first step is to remove the case screws. Depending on the make and model of your computer, there may be anywhere from two to six screws holding the case in place. These screws are typically located on the back or side of the case, so you’ll need to turn your computer around or slide it out from under your desk to access them.
Once you locate the screws, use a screwdriver to carefully unscrew them. Make sure to keep the screws in a safe place so that you don’t lose them. With the screws removed, you should be able to slide the side panel of the case off, giving you access to the components inside your computer.
Opening up your computer case can seem intimidating, but with a bit of patience and care, it’s a straightforward process that can help you upgrade or fix your computer.
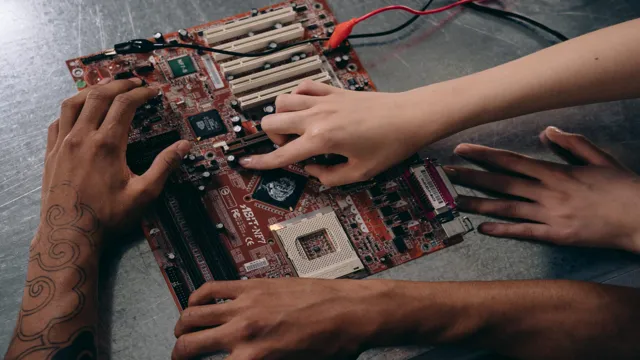
Removing Your Graphics Card
If you need to upgrade or repair your graphics card, you’ll definitely need to know how to remove the graphics card from your motherboard. It may seem like a daunting task, but with proper guidance, it’s a straightforward process. The first step is to disconnect your computer from the power source and ground yourself to prevent electrostatic discharge.
Then, locate the slot where your graphics card is connected, which is typically towards the end of the motherboard. Carefully remove any screws or clips holding the card in place and gently pull it out of the slot. Be sure to support the card with one hand as you pull it out to prevent damage to the slot or the card itself.
Once the card is disconnected, it’s time to install the new graphics card or make any necessary repairs. Reversing the process will be easy – just insert the card into the slot and secure it with any screws or clips that were removed. By following these simple steps, you can easily remove or replace your graphics card and get back to enjoying your computer with upgraded graphics capabilities.
Locate Graphics Card
If you’re looking to remove your graphics card, the first thing you need to do is locate it inside your computer. Most graphics cards are installed in the PCI slot on the motherboard, which is usually located towards the back of the computer. Once you’ve located the graphics card, you’ll want to make sure you’ve properly shut down your computer and unplugged it before proceeding with removing the card.
Then, start by removing any screws or brackets that are holding the graphics card in place. Next, gently push down on the release lever on the PCI slot and pull the graphics card out of the slot. It’s important to be gentle when removing your graphics card as it can be delicate and easily damaged.
With these steps, you should be able to successfully remove your graphics card from your computer.
Remove Any Connections
When it comes to removing your graphics card, it’s important to start by removing any connections. The first step is to power down your computer and disconnect all cables. Once this is done, you’ll need to open up your computer case and identify the graphics card.
Make sure to touch a grounded metal object to discharge any static electricity before handling the card. Then, carefully remove any screws or latches that are holding it in place. Gently rock the card back and forth to loosen it, and then lift it out of the slot.
Be sure to place it in a safe location, such as an anti-static bag, to prevent any damage. Removing a graphics card may seem intimidating, but with some patience and care, it can be done easily.
Remove Graphics Card Screw
Removing the graphics card from your computer can be a bit intimidating, especially if you aren’t familiar with tinkering with hardware. However, it’s a relatively simple process, and removing the graphics card screw is the first step. The graphics card screw is usually located on the backside of the card, and it secures the card to the motherboard.
You’ll need a screwdriver to remove it, but be careful not to strip the screw or damage the card. Once the screw is removed, gently pull the card out of the PCIe slot and unplug any power connectors before completely removing it from your computer. By taking your time and following these steps, you can easily remove your graphics card without any mishaps.
Carefully Remove Graphics Card
If you want to upgrade or replace your graphics card, you’ll need to carefully remove it from your computer. First, make sure your computer is turned off and unplugged from the wall. Then, locate your graphics card – it’s typically located in the PCI Express slot on your motherboard.
Gently press down on the small lever on the side of the slot to release the card. Slowly wiggle the graphics card back and forth until it pops out of the slot. Be careful not to bend or damage the card as you remove it.
Once the card is removed, you can work on upgrading or replacing it. Remember, always handle your graphics card with care to avoid causing any damage.
Final Steps
Removing a graphics card from a motherboard is a simple process that doesn’t require any special skills or tools. First, ensure that your computer is turned off and unplugged from the mains. Next, locate the graphics card and identify the retention mechanism.
Most graphics cards have a retention mechanism that secures the card to the motherboard. This mechanism is usually a small lever that needs to be lifted or a latch that needs to be pressed. Once you have unlocked the retention mechanism, gently pull the graphics card out of the motherboard’s PCIe slot.
Be careful not to damage any other components while doing this. And that’s it, you have successfully removed the graphics card from your motherboard. Remember, when reinstalling a graphics card or installing a new one, ensure that you line up the PCIe slot and the port correctly.
You may also need to secure the card with screws or a retention mechanism, depending on your motherboard. In conclusion, removing a graphics card from a motherboard is not as difficult as it may seem. Follow the above steps carefully, and you’ll have it removed in no time.
Check for any damage
When completing a DIY project or home renovation, it’s essential to check for any damage before calling it a wrap. Checking for damage allows you to address any issues that may have arisen during the renovation and prevent future problems from occurring. Start by inspecting the surrounding area for any signs of damage, such as cracks, dents, or holes.
From there, move on to the new fixtures and fittings, checking for any loose screws or broken pieces. If you notice any issues, be sure to fix them promptly to avoid adding to your list of renovation tasks. Taking the time to perform a thorough inspection ensures that your new space is not only beautiful but durable and safe as well.
Remember, prevention is key, and being proactive in your approach will save you time and money in the long run.
Replace Case Cover
When it comes to replacing the case cover of your device, the final steps are crucial. After successfully removing the old cover and installing the new one, you must ensure that everything is locked in place properly. Start by checking that all screws are tightened securely and in their original spots.
Next, gently press down on the edges of the case cover to ensure it is flush against the device’s body. This will prevent any dust or debris from getting inside and causing damage. If everything looks good, turn on your device and check that it is functioning properly.
Congratulations, you have successfully replaced your case cover!
Reconnect Everything
Reconnecting your devices after setting up your home network is the final step in achieving a seamless connection. You’ll want to double-check that each device has a strong signal and is properly connected to ensure everything runs smoothly without any interruptions. Start with your main device, such as your computer or TV, and work your way through the rest.
It’s best to have each device close to your router to avoid any potential signal strength issues. Don’t forget to connect any additional devices, such as printers or gaming consoles, to your network as well. Just like putting together a puzzle, each device needs to be in its proper place to complete the picture.
By following these final steps, you’ll be able to enjoy fast and stable internet connection on all your devices in no time!
Conclusion
Well, there you have it! Removing a graphics card from your motherboard is a straightforward process that can be accomplished with a few easy steps. Just remember to power down your system, disconnect all cables, and be gentle when handling your hardware. As always, safety first! With a little patience and care, you’ll have that graphics card out in no time.
And who knows, maybe you’ll even be persuaded to tackle some more DIY computer upgrades. Happy tech-ing!”
FAQs
What tools do I need to remove a graphics card from a motherboard?
You will need a screwdriver, antistatic wrist strap, and a plastic pry tool.
Is it necessary to uninstall the graphics card drivers before removing it from the motherboard?
Yes, it is recommended that you uninstall the graphics card drivers before removing the card from the motherboard to avoid any issues.
How do I properly disconnect the power cables from the graphics card before removal?
First turn off your computer and unplug it from the wall. Then gently grip the power cable and wiggle it gently but firmly to release it from the graphics card.
Can I remove a graphics card without removing the entire motherboard?
Yes, it is possible to remove a graphics card without removing the entire motherboard. Simply locate the latch or screw holding the card in place, remove it, and gently pull the card out.