
Have you ever wanted to connect your computer to a monitor or TV but realized that your motherboard lacks an HDMI port? Look no further, because in this blog, we will discuss how to enable HDMI on your motherboard. Enabling HDMI on your motherboard simply means that you will be able to connect your computer to a monitor or TV through the HDMI port. Having this capability opened up to your motherboard can make it easier to present slides, stream movies, or games on a bigger screen.
If you’re wondering now how to enable HDMI on your motherboard, don’t worry – it’s not rocket science. In fact, you can follow a few basic steps and have this feature up and running in no time. Our step-by-step guide will walk you through the process of enabling HDMI on your motherboard, making it as easy as pie.
Overall, having an HDMI port on your motherboard can be a useful feature, especially if you’re someone who regularly connects your computer to a monitor or TV. So, let’s not waste any more time and dive into how to enable HDMI on your motherboard today!
Check Your Motherboard’s Compatibility
Enabling HDMI on your motherboard can sometimes be challenging, especially if you are not aware of the compatibility issues. Before attempting to enable your HDMI port, it’s essential to check whether your motherboard is compatible with an HDMI output. Some motherboards don’t have an HDMI interface, while others require a separate graphics card to function correctly.
Your motherboard manufacturer’s website can provide you with this information, along with its specifications. Once you determine that your motherboard is indeed HDMI-compatible, you may need to enable HDMI in the BIOS settings, and configure the software settings to ensure that your computer sends the correct video signals through the HDMI cable. With this information, you can enable your HDMI port with ease, unlocking a new level of multimedia experience.
So, remember to check your motherboard’s compatibility before trying to enable HDMI, and enjoy the full potential of high-quality audio and video output.
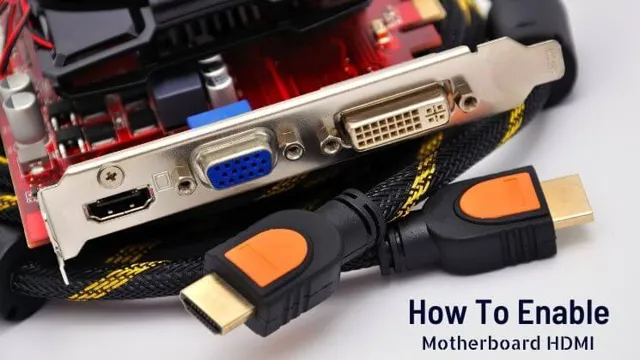
Verify the HDMI Slot on Your Motherboard
To make the most out of your PC’s multimedia capabilities, it’s important to verify the HDMI slot on your motherboard. Not all motherboards come with an HDMI port, which means you’ll need to double-check your motherboard’s compatibility before connecting it to your monitor or TV. The first step is to inspect your motherboard and locate the HDMI slot.
It should be located on the rear I/O panel alongside other video output ports such as VGA, DVI, and DisplayPort. If you cannot locate the HDMI port, it’s possible that your motherboard doesn’t have one, which means you’ll either need to upgrade to a new motherboard or purchase a separate graphics card that has an HDMI output. Ultimately, ensuring compatibility between your motherboard and monitor or TV will allow you to enjoy a seamless visual experience without any hiccups.
Check the BIOS Settings of Your Motherboard
When building a new PC, it’s crucial to select components that are compatible with each other. One of the most important components in a PC is the motherboard, which must be compatible with all other components such as the CPU, RAM, and GPU. Before purchasing any motherboard, it’s essential to check its compatibility with the other components you plan to use in your build.
You can check the motherboard’s compatibility by referring to the manufacturer’s website or consulting online forums and communities. Once you have identified a compatible motherboard, the next step is to check its BIOS settings. The BIOS is a firmware that controls the motherboard and hardware components.
You need to ensure that the BIOS on your motherboard is up to date and set up correctly for your build to function smoothly. Updating the BIOS can fix bugs and issues you may encounter, but you must be cautious as an interruption during the process can cause irreversible damage to your motherboard. Therefore, take the time to ensure your motherboard’s compatibility and BIOS settings to guarantee a stable and efficient PC.
Connect Your Monitor to the Motherboard
If you’re wondering how to enable motherboard HDMI and connect your monitor to the motherboard, there are a few simple steps to follow. First, ensure that your motherboard has an HDMI port. If it does, connect your HDMI cable to the port on your motherboard and the other end to your monitor.
Next, turn on your computer and wait for it to boot up. Once it’s up and running, you may need to adjust your display settings to ensure that the computer is sending the appropriate signal to your monitor. This may involve navigating to your computer’s device manager and selecting the appropriate display driver.
Overall, connecting your monitor to the motherboard via HDMI can be a simple and effective way to enhance your computing experience. So if you haven’t done so already, give it a try today!
Plug the HDMI Cable from Your Monitor in the HDMI Slot of Your Motherboard
When it comes to setting up your monitor, one of the most critical steps is connecting it to your motherboard. To do this, you’ll need an HDMI cable that can plug into the HDMI slot on both your motherboard and monitor. This might seem like a relatively easy task, but you’d be surprised at how many people get it wrong.
It’s important to make sure that the cable is firmly plugged into both slots to ensure a stable and clear connection. Once the cable is securely in place, you can turn on your computer and your monitor should display your desktop. Keep in mind that some motherboards do not have an HDMI slot, so you may need to use a different type of cable or connect your monitor to a graphics card instead.
By following these simple steps, you’ll be well on your way to enjoying your computer’s visuals in all their HD glory!
Turn On Your Computer and Monitor
When it comes to setting up your computer, connecting your monitor to the motherboard is a crucial step. The first thing you’ll need to do is locate the video ports on both your monitor and your motherboard. Your monitor should have a VGA, DVI, HDMI, or DisplayPort port, while your motherboard will likely have a VGA and/or HDMI port.
Once you’ve identified these ports, you’ll need to connect them using the appropriate cable. Make sure you screw in any DVI or VGA connectors to ensure a secure connection. Once you’ve connected the two, turn on your computer and monitor to ensure that the display is working properly.
If you encounter any issues, try checking your connections or consulting your computer’s user manual for troubleshooting tips. By properly connecting your monitor to your motherboard, you’ll be well on your way to a fully-functional computer.
Access the BIOS Setup and Enable the HDMI Output
To access the BIOS setup and enable HDMI output on your computer, you first need to connect your monitor to the motherboard. This is a vital step that requires proper attention to avoid any issues with display output. Once you have connected your monitor, you can start the process of accessing the BIOS setup.
To do this, you need to restart your computer and press the BIOS key repeatedly during startup. The key may vary depending on the computer model you have, but it is typically F2 or Delete. Once you have accessed the BIOS setup, navigate to the Display settings option and select the Integrated Graphics option.
From there, you can enable the HDMI output and save any changes made. With these steps accomplished, you can now enjoy a smooth display output on your monitor. It’s essential to note that it’s important to be cautious and follow the steps correctly to avoid any mistakes that can damage your computer.
Troubleshooting Tips
If you’re having trouble enabling the HDMI port on your motherboard, don’t panic! There are a few steps you can take to troubleshoot the issue. Firstly, make sure that your HDMI cable is properly connected to both your monitor and your computer. It may seem obvious, but often times a problematic connection can be the root of the issue.
Secondly, check your computer’s settings to ensure that the HDMI port is enabled. To do this, go to your computer’s display settings and select the option to extend your display. From there, you should see the option to enable your HDMI port.
If you’re still having issues, try updating your computer’s graphics drivers. Outdated drivers can often cause issues with HDMI connectivity. Finally, if none of these solutions work, it may be worth checking to see if your HDMI port is defective or damaged.
In any case, with a little bit of troubleshooting you should be able to get your HDMI port up and running in no time!
Update Your Graphics Driver
When you’re experiencing issues with your computer’s graphics, one of the first things you should try is updating your graphics driver. A graphics driver is a software component that helps your computer communicate with your graphics card, allowing it to display images and videos on your screen. Outdated or malfunctioning graphics drivers can cause a range of problems, from blurry or distorted images to crashes and freezes.
Fortunately, updating your graphics driver is usually a simple process. You can typically find the latest driver on the manufacturer’s website, and it’s a good idea to do this regularly to ensure your computer is running smoothly. So, if you’re having trouble with your graphics, don’t panic – try updating your driver first.
Your computer will thank you.
Reset Your Computer’s BIOS Settings
If you’re experiencing issues with your computer such as sudden crashes, booting problems, or warning messages, it could be time to reset your computer’s BIOS settings. BIOS (Basic Input/Output System) is a firmware that controls the initial set up of your computer’s hardware and software configuration. When these settings become corrupted or incorrect, they can cause your computer to malfunction.
To reset your BIOS settings, you need to access the BIOS menu at start-up, locate the option to “Load Default Settings”, and confirm the change. This will restore your computer’s BIOS settings to the original factory settings. Keep in mind, resetting your BIOS settings can also erase any changes you’ve made to your computer’s settings, so make sure you have a backup ready.
By resetting your computer’s BIOS settings, you can save yourself a headache and get back to using your computer without any trouble.
Conclusion
In conclusion, enabling your motherboard’s HDMI can be as simple as updating your drivers or tweaking some settings in your BIOS. With this feature activated, you can enjoy high-quality video and audio output on your monitor or TV. So, don’t let that HDMI port go to waste – unleash its full potential and let your multimedia experience soar!”
FAQs
What are the requirements to enable HDMI on the motherboard?
To enable HDMI on the motherboard, you need a processor with integrated graphics and a motherboard with an HDMI compatible port.
How do I enable HDMI on my motherboard?
You can enable HDMI on your motherboard by entering the BIOS/UEFI settings and enabling the integrated graphics. Then connect your HDMI cable to the motherboard’s HDMI port and your monitor’s HDMI port.
What if my motherboard doesn’t have an HDMI port?
If your motherboard doesn’t have an HDMI port, you can purchase a graphics card with an HDMI port and install it on your motherboard. Then enable the graphics card in the BIOS/UEFI settings and connect your HDMI cable to the graphics card’s HDMI port and your monitor’s HDMI port.
My motherboard has an HDMI port but it’s not working. What could be the issue?
The issue could be related to the motherboard’s BIOS/UEFI settings, integrated graphics driver, or HDMI cable. Try updating the BIOS/UEFI settings and graphics driver to the latest version. Also, make sure the HDMI cable is properly connected and not damaged.