
Have you ever experienced the frustration of not being able to identify the BIOS chip on your motherboard? Maybe you accidentally erased your BIOS or you are trying to update it, but you don’t know where to look for it. Fear not, as in this blog post we will explore how to identify the BIOS chip on your motherboard in easy-to-follow steps. Think of the BIOS chip as the brain of your computer’s motherboard.
It is responsible for initializing and maintaining the hardware and software necessary for your computer to function properly. The BIOS chip stores the settings for everything from the date and time to the boot order of your computer. Knowing how to identify the BIOS chip is useful when you need to replace or update it in case of errors or security issues.
Identifying the BIOS chip on your motherboard is not as complicated as it sounds. You don’t need to be a computer expert to do it. We will guide you through the process, providing you with tips and helpful information along the way.
So, grab your screwdriver and let’s get started on this exciting journey to find the BIOS chip on your motherboard!
Tools you need
If you’re planning on flashing your motherboard’s BIOS, you’ll need to identify which chip on the motherboard you’ll be working with beforehand. Luckily, there are some tools you can use to help with this process. The first tool you’ll need is a magnifying glass or a strong magnifier.
This will enable you to get a closer view of the motherboard and the individual chips on it. You’ll also need a flashlight or a mobile phone with a bright screen to help reflect light onto the chip and make it easier to read the labels. Once you’ve located the chip, you can use software such as CPU-Z or HWiNFO to help identify it further.
These programs can provide you with detailed information about the chip, such as the manufacturer, model, and size. This information will be important when it comes to finding the correct BIOS update file for your motherboard. Overall, identifying the BIOS chip on your motherboard can be a little tricky, but with the right tools and software, it’s a simple process that shouldn’t take too long.
Flashlight and magnifying glass
When it comes to your DIY projects, having the right tools is essential. Two important items that every DIY enthusiast should have in their toolbox are a flashlight and a magnifying glass. A flashlight comes in handy when working in dark or dimly lit areas, and it helps you to see what you’re working on more clearly.
Furthermore, a magnifying glass is a must-have tool for precision work, especially when the naked eye just isn’t enough. A magnifying glass can help you to spot small details and errors that are easily missed, so you can correct them before they cause bigger problems later on. Whether you’re fixing a leaky faucet or building a new piece of furniture, having a flashlight and a magnifying glass will make your project much easier and more successful.
So, make sure you add these essential tools to your toolkit today and get ready to tackle any DIY project like a pro!
Flathead screwdriver
When it comes to DIY projects or Household repairs, having the right tools is essential. One of the must-have tools in your toolbox is a flathead screwdriver. This versatile tool comes in various sizes and shapes, making it suitable for multiple applications.
Its primary function is to tighten or loosen screws, but it can also be used for prying open lids or removing nails. A flathead screwdriver is an excellent tool for DIY enthusiasts, homeowners, or professionals. Its flat tip design helps to prevent slipping and provides a better grip, making it easier to apply force to screws or nails.
Moreover, its flat design allows it to fit into tight spaces and corners, making it a go-to tool for hard-to-reach areas. In conclusion, if you are a DIY enthusiast or a homeowner, having a flathead screwdriver in your toolbox is a must-have, and it will become your go-to tool for any repair or project.
Locating the BIOS chip
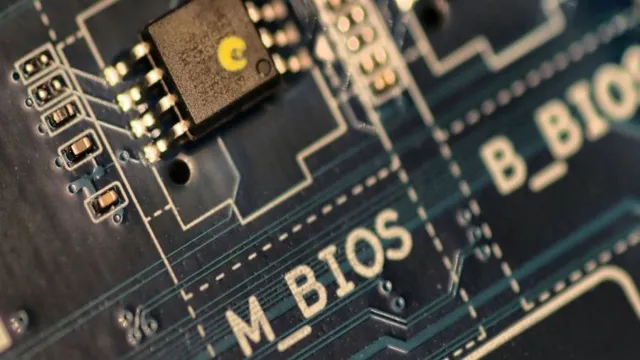
If you’re looking to update your BIOS or make changes to your motherboard’s settings, the first task is to locate the BIOS chip. It’s typically a small, rectangular chip that can be found on the motherboard, which stores all the system firmware settings. In most cases, you can find it near the CPU socket or on the edge of the motherboard.
The best way to identify the BIOS chip is to check the motherboard manual provided when you purchase it. The manual will have a diagram or description with the location of all the motherboard components, including the BIOS chip. If you don’t have the manual, you can also search for the motherboard model number online and look at motherboard schematics that may display the BIOS chip location.
Identifying the BIOS chip is crucial because it’s where firmware settings are stored, and if you damage it, it may render your motherboard unusable.
Check the motherboard manual
When it comes to locating the BIOS chip on your motherboard, it’s important to consult the manual. The motherboard manual contains all the information you need to find the BIOS chip, whether it’s a physical diagram or a written description. Look for a section called “BIOS” or “CMOS”, where you will find the location of the BIOS chip indicated.
In general, the BIOS chip is a small rectangular chip located on the motherboard, usually near the CMOS battery. Once you have located the BIOS chip, it’s important to be careful when handling it. The BIOS chip is a critical component, and any damage can cause serious issues that may require professional repair.
By checking the motherboard manual, you’ll be able to find the BIOS chip and take the necessary precautions to protect it.
Search online for schematics
When it comes to fixing a broken BIOS chip, the first step is finding it. Luckily, with the help of the internet, locating the BIOS chip is easier than ever. One useful resource is to search online for schematics of your specific motherboard.
These schematics will typically include a diagram that shows the location of the BIOS chip on the board. Additionally, some manufacturers may provide their own documentation that outlines the location of the BIOS chip. It’s important to note that the BIOS chip can vary in appearance and size, so it’s important to compare the schematics to the physical board to confirm the location.
By utilizing these resources, you’ll be able to quickly identify the location of the BIOS chip on your motherboard, allowing you to proceed with repairing or replacing it. Remember, if you’re unsure about any step of the process, it’s always better to seek the assistance of a professional rather than potentially causing further damage.
Identify the silkscreen label
When it comes to identifying the silkscreen label on a motherboard, one of the first steps is to locate the BIOS chip. The BIOS chip is often labeled with its manufacturer and model number, which can be useful in identifying the motherboard. The location of the BIOS chip can vary depending on the motherboard, but it is typically located near the edge of the board and may be labeled as “BIOS” or “CMOS.
” It’s important to be careful when handling the motherboard and the BIOS chip, as any damage can potentially cause permanent damage to the board. By locating the BIOS chip and identifying its manufacturer and model number, you can better determine the model of the motherboard and locate the silkscreen label, which can provide additional information about the board’s specifications and features.
Identifying the type of BIOS chip
If you need to identify the type of BIOS chip on your motherboard, there are a few methods that you can use. First, you can check the motherboard manual or manufacturer’s website to see if they provide information about the BIOS chip model or type. You can also use motherboard diagnostic software to identify the BIOS chip type, or examine the BIOS chip itself.
To do this, you’ll need to open up your computer case and locate the BIOS chip on the motherboard. Once you’ve found it, you can usually identify the type by looking for markings or labels on the chip itself. These markings may include the manufacturer name, model number, or other identifying information.
You can then use this information to determine the type of BIOS chip you have, and whether it needs to be updated or replaced. By taking the time to identify your BIOS chip, you can ensure that your computer is running smoothly and efficiently, and avoid any potential compatibility or performance issues.
Look for the manufacturer logo
Identifying the type of BIOS chip can be challenging, especially if you are not familiar with the different manufacturer logos. However, the easiest way to recognize the BIOS chip is to look for the manufacturer logo printed on the chip. The logo could be that of American Megatrends (AMI), Phoenix Technologies, or Award Software, to name a few popular BIOS chip manufacturers.
While this is not always failsafe, as some chips may not have a manufacturer logo, it is a good place to start. You can then use internet resources to compare the logo to known BIOS chip manufacturers to determine which chip you have. Alternatively, you can try entering the motherboard’s model number into a search engine, as this might reveal the chip manufacturer.
Remember, always be careful when working with computer hardware, and if you are unsure about anything, seek professional help to avoid damaging your components.
Check the chip markings
When it comes to identifying the type of BIOS chip, one of the first things to do is check the chip markings. These markings can provide important clues about the manufacturer, model number, and date of production. Look for any logos, symbols, or codes that may be engraved or printed on the chip’s surface.
You can use this information to research the chip online or talk to a technician who specializes in BIOS repair. Sometimes the markings may be difficult to decipher, but don’t worry- there are plenty of resources available online that can help you decode them. By taking the time to properly identify your BIOS chip, you can ensure that you have the correct replacement part if needed and can better understand the capabilities of your device.
So take a close look at those markings and see what they can tell you!
Conclusion
In conclusion, identifying the BIOS chip on a motherboard is like finding a needle in a haystack – except the haystack is a computer with a bunch of tiny chips. But fear not, dear reader, with a little bit of knowledge about the layout and components of a motherboard, and some careful inspection using a magnifying glass, you can uncover the elusive BIOS chip and confidently proclaim, “Eureka! I have found it!” So go forth and embrace the challenge of identifying the BIOS chip on your motherboard, and always remember: where there’s a will, there’s a way (and probably a magnifying glass).
FAQs
What is a BIOS chip?
A BIOS chip is a small, removable chip located on the motherboard that is responsible for storing the basic input/output system (BIOS) of a computer.
How do I locate the BIOS chip on my motherboard?
The BIOS chip is usually located near the edge of the motherboard and is identified by its small size and rectangular shape. Refer to your motherboard’s manual for specific instructions on locating the BIOS chip.
Can I replace my BIOS chip?
Yes, a BIOS chip can be replaced if it becomes damaged or corrupted. However, it is important to ensure that the replacement chip is compatible with your motherboard and that the installation process is done correctly to avoid damaging the motherboard.
What are some common signs of a failing BIOS chip?
Common signs of a failing BIOS chip may include the inability to boot or shutdown properly, a blank screen, or error messages during startup. If you suspect that your BIOS chip is failing, it is important to seek professional assistance to avoid causing further damage to your computer.