
Have you ever wanted to connect your computer to a display or TV screen without having to deal with extra cables? Well, luckily, most modern motherboards come with an HDMI port that allows you to do just that. However, sometimes this port is not enabled by default, leaving you scratching your head and wondering how to make it work. In this blog post, we will explore the steps you need to take to enable your motherboard’s HDMI port and enjoy seamless connectivity between your computer and any HDMI-enabled display.
So, sit tight and get ready to unlock the full potential of your computer’s hardware!
Check if your motherboard supports HDMI
If you’re unsure whether your motherboard supports HDMI or not, there are a few easy ways to check. First, you can look up the specifications of your motherboard online. This should give you a clear answer as to whether it has a built-in HDMI port or not.
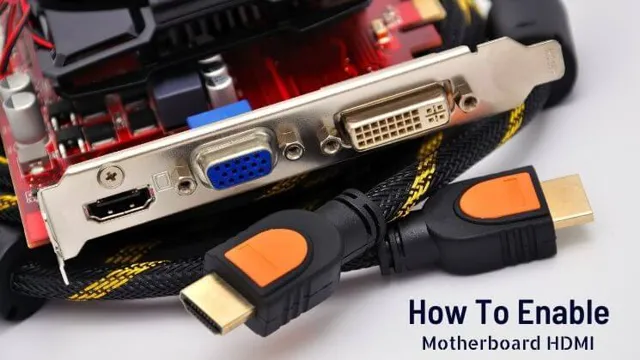
Another way is to physically inspect your motherboard and check for a HDMI port. Most modern motherboards come with at least one HDMI port, so it should be relatively easy to spot. If your motherboard does support HDMI, the process of enabling it should be straightforward.
Simply connect your monitor or TV to the HDMI port on your motherboard, and then boot up your computer. If everything is installed correctly, you should be able to see your screen on your chosen display. If you’re still having trouble, make sure to check your graphics settings and make sure that your display is set to HDMI as the input.
With a little bit of troubleshooting, getting your motherboard’s HDMI port up and running should be a quick and painless process.
Research your motherboard model for HDMI compatibility
If you’re planning to connect your PC to a high-definition monitor or TV, it’s essential to verify if your motherboard has HDMI compatibility. HDMI ports allow you to transmit audio and video signals in high quality using a single cable. To verify if your motherboard supports HDMI, you should research your motherboard model.
Most motherboard manufacturers provide specifications and compatibility lists on their websites or product manuals. Consult these resources to ascertain if your motherboard has an HDMI port or if you need an adapter. Keep in mind that HDMI compatibility may vary depending on the version of your motherboard.
Therefore, it’s crucial to check the details carefully before purchasing a graphics card or purchasing new hardware. Don’t worry if you encounter any difficulties. Several online communities can offer assistance in identifying your motherboard model and determining its compatibility with HDMI cables.
Review the motherboard manual for HDMI ports
If you’re planning on using HDMI to connect your computer to a monitor or TV, it’s important to check if your motherboard has an HDMI port. The best way to do this is by reviewing the motherboard manual. It should include a section that lists all the ports available on the board, including HDMI.
If your motherboard doesn’t have an HDMI port, don’t worry. You can still use a dedicated graphics card that has an HDMI port or invest in a DisplayPort-to-HDMI adapter. However, if your motherboard does have an HDMI port, it’s important to ensure that it supports the version of HDMI that you need.
Some motherboards only support HDMI 4, which may not work with 4K monitors or TVs. Overall, checking if your motherboard supports HDMI and its version can save you time and money when setting up your computer for multimedia use.
Update graphics drivers
Are you having trouble enabling the HDMI port on your motherboard? One of the first steps you should take is updating your graphics drivers. This is essential to ensure that your computer has the latest software to properly communicate with your motherboard and its accompanying hardware. Graphics drivers are responsible for controlling your computer’s video output, so it’s important to keep them up to date to ensure that your HDMI port is functioning properly.
To update your graphics drivers, search for the make and model of your graphics card and download the latest drivers from the manufacturer’s website. Alternatively, you can use Windows device manager to check for updates and automatically install them. Once your graphics drivers are updated, you should be able to enable your motherboard’s HDMI port and enjoy media on your favorite devices.
Download and install the latest graphics drivers for your motherboard
If you’re experiencing issues with your computer’s graphics, it may be time to update your graphics drivers. Graphics drivers are software programs that are responsible for communicating between your computer’s graphics card and its operating system. An outdated or faulty driver can result in poor performance, crashes, or visual glitches.
To update your graphics drivers, you’ll need to identify the make and model of your graphics card, and then download the latest drivers from the manufacturer’s website. This process can be done manually or through an automated tool. Once you have downloaded the latest drivers, simply follow the on-screen instructions to install them onto your computer.
Remember, updating your graphics drivers can greatly improve your computer’s performance and provide a better visual experience while gaming or working on graphics-heavy applications. So, don’t wait any longer, give your graphics drivers an update today!
Restart your computer to apply the changes
One of the common ways to improve the performance of your computer is by updating your graphics drivers. Graphics drivers play a crucial role in enhancing the display quality of your computer, and keeping them updated can ensure that you have the best visuals possible. To update your graphics drivers, you can go to your computer’s manufacturer website and look for the latest updates available for your graphics card.
Once you find the appropriate drivers, simply download and install them on your system. However, it is important to note that updating graphics drivers may require you to restart your computer to apply changes. So, before updating, make sure to close all open programs and restart your computer to get the best performance possible.
By keeping your graphics drivers up to date, you can ensure that your computer’s display quality is optimized and that you are getting the best visual experience possible.
Adjust display settings
Enabling the HDMI port on your motherboard is easy. First, make sure that your computer is turned off and unplugged from the power source. Next, locate the HDMI port on the back of your computer and plug in the HDMI cable.
Once the cable is plugged in, turn on your computer and wait for it to boot up. If your computer does not automatically detect the HDMI connection, you may need to adjust the display settings. To do this, right-click on your desktop and select “Display Settings.
” From there, choose the “Advanced Display Settings” option and select the option to detect additional displays. This should enable your computer to recognize the HDMI connection to your motherboard. With these simple steps, you can easily enable your motherboard’s HDMI port and enjoy high-quality video and audio on your monitor or TV.
Open display settings on your computer
When it comes to adjusting your display settings on your computer, the process can sometimes feel overwhelming. However, it’s actually quite simple to open them up and make changes that can benefit your specific needs. To get started, you’ll want to locate the settings on your computer.
Depending on whether you’re using a PC or a Mac, the location of these settings may vary. Once you’ve found them, it’s just a matter of selecting the display settings and making the necessary adjustments. This can include altering the brightness or contrast, changing the resolution, or adjusting the size and orientation of your screen.
By taking the time to familiarize yourself with your display settings and making the necessary changes, you can greatly enhance your computer experience and make it easier on your eyes.
Select the HDMI option for display output
If you’re using a computer or laptop with an HDMI port, it’s essential to select the HDMI option for display output. The HDMI option allows you to connect your device to a larger screen, such as a TV or monitor. To adjust your display settings, you can start by right-clicking on your desktop and selecting “Display Settings” from the drop-down menu.
From there, you can choose the resolution, orientation, scaling, and brightness settings that are best suited for your needs. Adjusting your display settings can significantly improve the overall appearance of your computer or laptop screen. So, the next time you connect your device to a larger screen, make sure you select the HDMI option, and adjust your display settings for an optimal viewing experience.
Troubleshooting
Are you having trouble getting the HDMI port on your motherboard to work? Don’t worry; it’s a common issue that many people face. The first thing you should do is ensure that your graphics card drivers are up-to-date and installed correctly. If you’re still having issues, navigate to your BIOS settings and ensure that your onboard graphics are enabled.
Once you’ve done that, restart your computer and check to see if the HDMI port is working correctly. If you’re still not having any luck, try updating your BIOS to the latest version. However, always be careful and make sure you understand the process before attempting to upgrade your BIOS.
By following these steps, you’ll be able to enable the HDMI port on your motherboard and enjoy high-quality video output.
Check physical connections of HDMI cable
When you’re having trouble getting a signal between your device and TV, one of the first things to check is the physical connections of your HDMI cable. It’s important to ensure that the cable is plugged in securely at both ends, as a loose connection can cause problems or even prevent any signal from getting through. If you’ve checked the connections and they seem fine, try unplugging the cable and plugging it back in again to see if that resolves the issue.
If you still don’t get a signal, it’s possible that the cable itself may be damaged or faulty and may need to be replaced. Remember, a little troubleshooting can often go a long way in getting your devices to communicate with each other effectively.
Make sure HDMI port is not disabled in BIOS settings
If your HDMI port isn’t working, one of the first things to check is whether it’s disabled in your computer’s BIOS settings. BIOS (Basic Input/Output System) is a software that operates your computer’s hardware. To access it, restart your computer and press the key required to enter BIOS when prompted (usually F2 or Del).
Once in BIOS, navigate to the “Integrated Peripherals” or “Advanced Settings” menu and look for an option related to your HDMI port. If it’s disabled, select it and press “Enter” to enable it. Save changes and exit BIOS.
This may or may not fix the problem, but it’s a good next step in troubleshooting. Remember to always check the cables and drivers before assuming it’s a BIOS issue.
Conclusion
In conclusion, enabling your motherboard’s HDMI functionality is an easy and seamless process that requires just a few steps. All you need is a basic understanding of your computer’s settings and a desire to elevate your multimedia experience. So, go forth and unleash the full potential of your motherboard’s HDMI capabilities.
Your eyes and ears will thank you!”
FAQs
What are the supported resolutions for HDMI on motherboards?
The supported resolutions for HDMI on motherboards can vary depending on the specific model. You can check the specifications of your motherboard to see which resolutions are supported.
How do I enable HDMI output on my motherboard?
To enable HDMI output on your motherboard, first make sure that your monitor is connected to the HDMI port on your motherboard. Then, go to the BIOS settings and look for an option that says “Onboard HDMI” or something similar. Enable this option to activate the HDMI output.
What should I do if the HDMI output on my motherboard is not working?
If the HDMI output on your motherboard is not working, there are a few things you can try. First, make sure that your monitor is connected to the HDMI port on your motherboard and that the cable is securely plugged in. You can also try updating the drivers for your motherboard’s graphics card. If these steps don’t work, there may be a problem with the hardware and you should contact the manufacturer for assistance.
Can I use the HDMI output on my motherboard and a separate graphics card at the same time?
In most cases, you cannot use the HDMI output on your motherboard and a separate graphics card at the same time. This is because most motherboards will automatically disable the onboard graphics when an external graphics card is detected. However, some motherboards may allow you to enable both the onboard graphics and the external graphics card at the same time. Check your motherboard’s specifications or manual to see if this is possible.