
Have you ever built your own computer and struggled with connecting the power button to the motherboard? Don’t worry, many first-time PC builders encounter this issue. It can be confusing trying to figure out which pins on the motherboard the power button cable should connect to. In this post, we’ll guide you through the process of connecting the power button to the motherboard.
We’ll explain what each pin on the motherboard means and which ones your power button cable needs to connect to. By the end of this post, you’ll have a clear understanding of how to connect the power button to the motherboard in no time. So, whether you’re a seasoned PC builder or a newbie, read on to learn more about one of the most important steps in building your own computer.
Get ready to take the first step to create your own computer with confidence –let’s dive in.
Identify the Power Button and Motherboard Pins
If you’re building your own computer or upgrading an existing one, it’s essential to know how to connect the power button to the motherboard. First, you need to identify the power button and motherboard pins. The power button is usually a small button located on the front or top of the computer case.
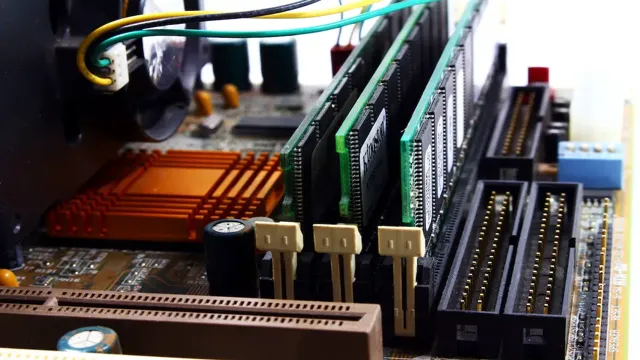
The motherboard pins, on the other hand, are usually located in the lower-right corner of the motherboard. Look for the panel labeled “front panel” or “system panel” to find the pins. Once you’ve located the power button and motherboard pins, it’s time to connect them.
You’ll need to refer to your motherboard’s manual to make sure you connect the pins correctly. Typically, you’ll need to connect two pins to the power switch connector. Make sure you connect the positive and negative cables to the correct pins.
Connecting the power button to the motherboard is a simple process, but it’s crucial to do it correctly to avoid damaging your hardware.
Locate the power button and pin headers on your motherboard.
When building a PC, one of the crucial steps is finding the power button and pin headers on your motherboard. The power button is usually located on the front panel of your computer case, while the motherboard pins are located near the bottom of the motherboard. It’s essential to differentiate between them since they serve unique functions.
The power button is the primary switch used to turn on/off the computer, while the motherboard pins are used to connect various components, such as the front panel connectors, reset switch, power LED, and HDD LED. A common method to identify the power button and pin headers is through the manual which comes with the motherboard. The manual provides a detailed diagram of the motherboard, indicating the power button and pin header’s location.
It’s essential to connect the power button and pin headers correctly to ensure the computer functions correctly when powered on. Overall, locating and identifying the power button and pin headers when building a PC is a vital step that shouldn’t be overlooked.
Check your motherboard’s manual to identify the location of the pins.
When building a computer, one of the essential steps is to connect the power button to the motherboard. To do that, you need to identify the location of the power button and motherboard pins. This process is straightforward as long as you have your motherboard’s manual close by.
The manual will guide you through the pin layout and identify which ones are responsible for the power button. Once you’ve located the pins, you need to connect the power button cable from the case to the corresponding motherboard pins. The manual will also indicate the right orientation for the cable.
With these simple steps, you can successfully connect your power button to the motherboard without any issues. By following your motherboard’s manual, you can avoid any confusion or frustration during this critical step in building your computer.
Connect the Cables
If you’re building your own PC, one important step is to connect the power button to the motherboard. This can be a bit daunting at first, but with a little patience and attention to detail, it’s not as tricky as it seems. First, locate the pins on the motherboard where the power button will connect.
These are usually located near the bottom of the motherboard, and there should be a set of pins labeled “Power SW” or something similar. Next, consult your motherboard manual to determine which two pins need to be connected to activate the power button. Once you have this information, carefully connect the two pins to the corresponding connector on the power button.
Make sure you connect them securely, but don’t force them if they don’t seem to fit. Finally, once everything is connected, turn on the power supply and press the power button to see if the system turns on. If it does, congratulations! You’ve successfully connected the power button to your motherboard.
Insert the power button cables into the motherboard pins.
When it comes to building your own computer, connecting the power button cables to the motherboard pins might seem like a daunting task. But fear not, it’s actually quite simple. First, locate the power button cables on your computer case.
They will usually be labeled and will consist of two wires with connectors at the end. Next, locate the corresponding pins on the motherboard. These pins will also be labeled and will usually be located near the bottom right corner of the board.
Once you have located both the cables and the pins, carefully insert the connectors into the pins. Make sure that the connectors are lined up correctly and that they are firmly in place. After that, you’re all set to turn on your computer! Just press the power button and watch your creation come to life.
With this easy step, you’ll be one step closer to enjoying all the benefits of a custom-built PC.
Match each cable to its corresponding pin according to the motherboard manual.
When building a computer, connecting the cables can be an important step that can often be overlooked. The motherboard manual will have details on which cables should be connected to which pins, ensuring optimal performance of your computer. Match each cable to its corresponding pin may seem overwhelming, but it doesn’t have to be.
Take your time and read the manual carefully to avoid any confusion. It’s important to understand that connecting the wrong cable to the wrong pin can damage the motherboard and other components. Don’t be afraid to ask for help or research online if you’re still unsure about which cable goes where.
It’s better to be safe than sorry. Remember, proper cable connection is an essential component to building a stable and efficient computer.
Use light pressure to firmly attach the cables to the pins.
When it comes to connecting cables, the first and most important step is to use light pressure to firmly attach them to the pins. This ensures that there is a secure connection and reduces the risk of any disconnections or damage to the cables. It’s important to remember that while attaching cables, never use excessive force as this can cause the pins to bend or break, rendering them useless.
It’s also crucial to ensure that you connect the cables to the correct pins, as this can prevent any damage to your device and make troubleshooting any issues easier. So take your time and double-check that all your cables are securely and properly attached. Remember, when in doubt, it’s always better to be safe than sorry.
Test the Connection
To power up a computer, you must connect the power button to the motherboard. To do so, you need to locate the power switch pins on your motherboard and connect them to your power button. The power switch pins are usually located around the bottom-right corner of the motherboard, near the front panel connectors.
Once you have identified the power switch pins, you’ll need to refer to your motherboard manual to see which two pins are for the power button. Then, you need to connect the two wires from the power button to those power switch pins. After you have connected the pins, it’s time to test the connection.
You can do this by pressing the power button and checking if the computer starts up. If it doesn’t, it is possible that you connected the wires incorrectly. Double-check your connections and try again.
Remember, correctly connecting the power button to the motherboard is crucial to ensuring that your computer starts up properly every time you press the power button.
Turn on your computer and check if the power button is functioning properly.
If you’re having trouble booting up your computer, one of the first things to check is the power button. Sometimes, this small component can become faulty and prevent your system from turning on. To test the connection, simply press the power button and observe how your computer reacts.
If nothing happens, you should ensure that the power cord is securely connected to both your computer and the outlet. You may also want to try unplugging the cord and plugging it back in again to see if this resolves the issue. If the power button still doesn’t seem to work, you may need to take your computer in for repairs to have the button replaced.
Remember, checking the power button is a simple step that can help you troubleshoot basic computer issues and avoid more complex problems later on.
If it’s not, check the connection and try again.
When it comes to troubleshooting connection issues, the first step is to test the connection to ensure it’s stable and working properly. If you’re experiencing issues with your internet or network connection, testing it can help diagnose the problem and determine the best course of action to resolve it. To test your connection, start by checking your modem and router to make sure they’re powered on and functioning correctly.
If everything appears to be working normally, try connecting to the internet or network using a different device to see if the issue is isolated to a particular device. If the problem persists, try resetting your modem or router, or contact your service provider for further assistance. Remember, if it’s not working, check the connection and try again until you can pinpoint the root cause of the issue and resolve it once and for all.
Conclusion
In conclusion, connecting the power button to the motherboard may seem daunting at first, but with a bit of patience and the right tools, anyone can do it! Remember to double-check your motherboard’s manual and take care not to damage any sensitive components. Of course, if all else fails, there’s nothing wrong with calling in a tech-savvy friend or professional. As they say, teamwork makes the dream work – or in this case, the computer power up.
“
FAQs
What is the purpose of the power button on a motherboard?
The power button on a motherboard is used to turn on or off the computer system.
How do I connect the power button to the motherboard?
To connect the power button to the motherboard, locate the Power SW or Power Button header on the motherboard and connect the two pins with the power button cable.
What if my power button is not working?
If your power button is not working, you may need to replace it. Alternatively, try connecting the reset button cable to the Power SW header as a temporary solution.
Can the power button cause damage to the motherboard?
It is unlikely that the power button will cause damage to the motherboard if connected correctly. However, if the power button cable is shorted or damaged, it could potentially harm the motherboard.