
Do you want to add more fans to your computer system to make it run cooler? Connecting multiple fans to a motherboard can reduce the temperature inside your computer and increase overall performance. But before you grab those fans and start connecting them, there are a few things you need to know. In this blog post, we will explain how to connect multiple fans to the motherboard without causing any damage to your computer and how to control their speed.
So, buckle up and let’s dive in!
Preparation and Tools Required
Connecting multiple fans to your motherboard can seem intimidating, but with a little preparation and the right tools, it can be a breeze. First, make sure that your motherboard has enough fan headers to support the number of fans you want to connect. It’s also important to have the proper cables for each fan, such as 3-pin or 4-pin connectors.
If your case doesn’t have enough space for all your fans, you may need to consider adding a fan splitter or hub to accommodate them all. When connecting the fans, be sure to match the positive and negative pins correctly, and consider using cables with different colors or stripes to keep them organized. With these preparations in place, you’ll be able to connect multiple fans to your motherboard and enjoy better cooling performance in no time!
Checking the Number of Connectors on the Motherboard
Before delving into the process of checking the number of connectors on the motherboard, it is crucial to prepare the necessary tools. The most critical tool required is the motherboard manual, which provides detailed information about the available sockets on the motherboard. Additionally, a Phillips head screwdriver may be required to access and inspect the motherboard safely.
It is also essential to ensure that the computer is adequately turned off and unplugged to avoid any potential electrocution during the examination process. Once all these requirements are in place, proceed to locate the manual, and open it to the section on the number of connectors on the motherboard. From there, observe the sockets available and compare them to the devices that need to be attached to the computer, such as displays, keyboards, or USB devices.
Always remember to handle the motherboard with great care to avoid any potential damage.
Calculating the Power Capacity of the Motherboard
When it comes to calculating the power capacity of your motherboard, there are a few things you need to keep in mind. First, you’ll need to have some basic information on the components that will be drawing power from the motherboard. This includes the CPU, GPU, and any other expansion cards you may be using.
You’ll need to know both the maximum power consumption of each component and the maximum voltage they require. Once you have this information, you can then calculate the total power capacity needed for your system. To make these calculations, you’ll need some specific tools, including a power supply unit (PSU) with a suitable wattage rating, a multimeter for measuring voltage and current, and a power consumption calculator.
You’ll also need to familiarize yourself with the power delivery system on your motherboard, including the power phases and any voltage regulators that may be present. This will help you to determine how much power can be delivered to each component and ensure that everything is working as it should be. Calculating the power capacity of your motherboard may sound like a daunting task, but with the right tools and information, it can be done relatively easily.
By taking the time to understand your components and the power delivery system on your motherboard, you can ensure that your system has the necessary power to operate effectively and avoid the risk of damage or failure due to insufficient power. So, whether you’re building a new system from scratch or upgrading an existing one, take the time to do your research and make sure you have everything you need to get the job done right.
Getting the Right Set of Fans
When it comes to getting the right set of fans for your brand or business, there are important preparations and tools to keep in mind. First and foremost, you need to establish your target audience and understand their interests and needs. This will help you tailor your content and marketing strategy to resonate with them.
Additionally, utilizing social media analytics tools such as Hootsuite, Google Analytics, and Sprout Social can be incredibly helpful in tracking and analyzing audience engagement and behavior. These tools can help you identify which types of content perform best, and adjust your strategy accordingly. Remember, the key is not just to accumulate a large following, but to build a community of engaged and loyal fans who are genuinely interested in your brand or business.
By investing time and effort in preparation and utilizing the right tools, you can attract and retain the right set of fans for long-term success.
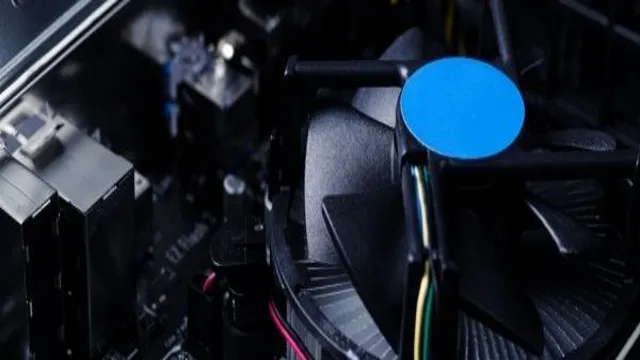
Installation of Fans to the Motherboard
Connecting multiple fans to your motherboard can be an excellent way to increase airflow and reduce the temperature of your computer components. Before starting the installation process, it’s crucial to verify the fan’s compatibility with your motherboard. To connect the fans, first, identify the fan headers on your motherboard.
Most motherboards come with several fan headers, with each header allowing you to connect a single fan. Once you’ve found the fan heads, attach the fans to the headers, ensuring you have secured them firmly. Consider using fan splitter cables if you need to connect more fans than available headers.
While connecting the fans, ensure they are arranged correctly as per the airflow direction. Once everything is appropriately connected, power on the computer and head into the BIOS to make sure your fans are functioning correctly. Overall, adding more fans to your motherboard can improve your computer’s cooling performance and prevent overheating issues.
Placing the Fans in the Right Spots
When it comes to building a computer, one of the most crucial components to focus on is the placement of fans. These fans play a significant role in preventing your system from overheating, which can cause severe damage to your computer components. To install fans onto your motherboard, you’ll need to identify the right spots for them and make sure they’re compatible with the motherboard’s layout.
The most common spots for fans are near the front panel, top panel, and rear panel of the computer case. You’ll also want to ensure that your fans are facing the right direction to provide optimal airflow. Installing fans on your motherboard may seem overwhelming at first, but it’s a necessary step to keep your system cool and running smoothly.
Remember, a little bit of cooling can go a long way in extending the lifespan of your computer. So, make sure you’re using the right fans in the right spots, and you’ll be well on your way to keeping your system cool and running smoothly for years to come.
Connecting the Fans to the Motherboard
Connecting the fans to the motherboard is a critical step when building a PC. It’s an essential part of ensuring the proper air circulation to keep the components running at optimal temperatures. Before you begin, make sure to check the motherboard’s manual to verify the compatible fan headers and the control options.
Typically, motherboards have specific slots for fan headers, labeled as CPU fan, system fan, or chassis fan. Once you’ve identified the correct headers, it’s time to install the fans. Connect the fan’s power cable to the appropriate header, and voila, you’ve connected the fan to the motherboard.
However, it’s good practice to verify the fan speed in the BIOS settings and make adjustments, if necessary, to find the ideal setting to balance temperature and noise levels. Remember, a well-connected fan can enhance the PC’s lifespan and boost performance, so take your time to ensure everything is set up correctly.
Troubleshooting and Tips
Connecting multiple fans to a motherboard can be a bit confusing, but it’s not too difficult once you know what to do. First, make sure your motherboard has enough fan headers to connect all your fans. Most motherboards have at least two, but some higher-end models can support up to six or more.
You can also use a fan splitter cable if you don’t have enough headers, but keep in mind that this will split the power and control signal, so all fans will run at the same speed. Once you have your headers sorted, simply connect each fan’s 3- or 4-pin connector to a header. Make sure you line up the notches on the connector correctly, as forcing it in can damage the pins.
Some newer fans have RGB lighting, in which case you’ll need to connect the lighting cable to a compatible header on your motherboard. After all the fans are hooked up, go into your motherboard’s BIOS or software and adjust the fan settings to your liking. You can set the speed curve to ramp up or down depending on temperature, or set them all to run at a fixed speed.
Keep in mind that running all your fans at full speed can create a lot of noise and may not be necessary, depending on your cooling requirements. Overall, connecting multiple fans to a motherboard is a simple process that can greatly improve your system’s cooling performance. Just make sure you have enough headers, use fan splitters if necessary, and adjust the settings to your liking.
With these tips in mind, you’ll have a cool and quiet system in no time!
Checking for Fan Compatibility and Software
When upgrading or replacing your computer’s fans, it’s important to make sure they’re compatible with your motherboard. Not all fans work with all motherboards, so it’s best to check the manual or manufacturer’s website for compatibility information. Additionally, you’ll want to make sure you have the necessary software to control your fans’ speed and settings.
Most fan manufacturers provide software for this purpose, and it’s usually available for download on their website. However, if you’re having trouble finding or using the software, there are plenty of online forums and tutorials that can help. Remember, proper fan compatibility and software usage can help keep your computer running smoothly and prevent overheating or other issues.
Troubleshooting for Faulty or Misplaced Fans
When it comes to faulty or misplaced fans, there are a few troubleshooting tips you can try before calling in a professional. First, check that the power source is connected properly and that the fan is turned on. Sometimes, it’s easy to overlook the simplest solutions.
If the fan is still not working, double-check that it is correctly installed in the designated location. It’s important to note that some fans may have specific wiring requirements, so check the manufacturer’s instructions before installation. Additionally, if your fan is making peculiar noises, it could be an indication of something more serious.
Consider reaching out to a professional if you suspect the issue is beyond your control. At the end of the day, it’s vital to ensure your fan is properly installed and in working order as it plays a crucial role in maintaining a comfortable living space.
Conclusion
In conclusion, connecting multiple fans to your motherboard is a breeze if you follow these steps: identify the appropriate fan headers, ensure proper cable management, and be mindful of the maximum wattage and amperage ratings. With a little bit of patience and a dash of technical know-how, you’ll be able to keep your system cool and running smoothly, while also impressing your friends with your computer building skills. Who needs a personal air conditioner when you’ve got a motherboard full of fans?”
FAQs
What is the maximum number of fans that can be connected to a motherboard?
The maximum number of fans that can be connected to a motherboard depends on the number of fan headers available on the motherboard. Some motherboards have only one or two fan headers, while others may have up to six or more. It’s important to check the specifications of your motherboard to see how many fan headers it has.
Can all fans be connected to the same header on the motherboard?
No, it is not recommended to connect all fans to the same header on the motherboard. Fans draw power and generate a signal that can cause the motherboard to malfunction if too many are connected to the same header. It is best to spread the fans out across multiple headers or use an external fan controller.
What is the difference between PWM and DC fan headers?
PWM (Pulse Width Modulation) fan headers are designed to regulate fan speed by sending pulses of power to the fan. DC (Direct Current) fan headers regulate fan speed by lowering voltage supplied to the fan. PWM headers are more precise and can control fan speed at lower RPMs than DC headers.
What is the best way to control multiple fans connected to the motherboard?
The best way to control multiple fans connected to the motherboard is through the BIOS or software provided by the motherboard manufacturer. This allows you to adjust fan speed based on temperature or manually set fan curves for optimal cooling performance. Alternatively, an external fan controller can be used for more precise control over multiple fans.