
Is your Brother printer producing documents with smudges, streaks or spots? It might be time to clean the drum. Brother printers are known for their high-quality printing but, like all printers, they require cleaning and maintenance. Cleaning the drum of your Brother printer can ensure that it continues to produce high-quality printouts and prolong its lifespan.
In this blog post, we will guide you through the process of cleaning your Brother printer drum, step-by-step. By the end of this article, you’ll be able to clean your Brother printer drum with ease and get back to producing exceptional printouts.
What is a printer drum?
If you own a Brother printer, you may be wondering about the drum and how to clean it. A printer drum is a critical component of a laser printer. It is responsible for transferring toner onto the paper.
The drum is typically cylindrical and coated with a photosensitive material that conveys an electrostatic charge. When you send a print command to your printer, the drum receives an electrical charge, which attracts toner particles to adhere to it. The drum then transfers the toner onto the paper.
Over time, the drum can accumulate toner particles and become dirty. If this happens, your printer may produce low-quality prints or stop working altogether. Fortunately, you can clean your Brother printer drum by removing it from the printer and using a soft, lint-free cloth to wipe it down.
By doing so, you can help to prolong the life of your drum and ensure that your printer continues to produce high-quality prints.
Explaining the component and its function
A printer drum is a vital component of the laser printing process. It is responsible for transferring ink or toner onto the paper. The drum is typically made of metal or plastic and is coated with a photosensitive material.
When exposed to a laser beam, the material on the drum becomes charged in specific areas. This charge attracts the ink or toner particles, which then bond with the paper. The printer drum needs to be in excellent working condition for the printing process to be efficient and produce quality prints.
Over time, the drum can become worn, causing streaks or spots on printed pages. It is essential to regularly maintain the drum and replace it when necessary to ensure the printer produces high-quality prints. Without a functioning printer drum, printing documents becomes impossible.
Signs that your drum needs cleaning
If you own a Brother printer, then you know how important it is to keep the drum clean. The drum serves as a major component of your printer, and it is responsible for transferring toner particles onto the paper. When the drum is contaminated with dust, toner or other debris, it can cause your printer to produce poor quality prints or worse, it may damage your machine.
Signs that your drum needs cleaning include black or grey streaks, blotches on printed pages, and images appearing lighter or faded. To clean the drum, start by removing it from the printer and wiping it gently with a soft, lint-free cloth. Then, reinstall the drum and run a test print to ensure the cleaning process was successful.
Remember, regular maintenance and cleaning of your Brother printer’s drum will not only improve print quality but also extend the life of your machine. So be sure to make it a routine task to keep your drum clean.
Identifying visible signs of a dirty drum
The drum is one of the most critical components of your printer. It plays a crucial role in transferring toner from the cartridge onto the paper. Over time, the drum can become dirty, which can result in print quality issues.
So, how do you know if your drum needs cleaning? One of the most visible signs of a dirty drum is streaks or smudges on your printed pages. These streaks and smudges indicate that the toner isn’t transferring evenly onto the paper. Another visible sign is a faded or light print.
This problem arises when the drum isn’t charging sufficiently, which can lead to uneven toner transfer. In addition, you might experience frequent paper jams and wrinkled output due to dirty drums. These problems can significantly impact your printer’s lifespan, and it’s essential to address and clean your drum regularly to avoid them.
By maintaining and cleaning your drum, you can ensure that your printer runs correctly and that your documents look professional.
Step-by-step guide to cleaning the drum
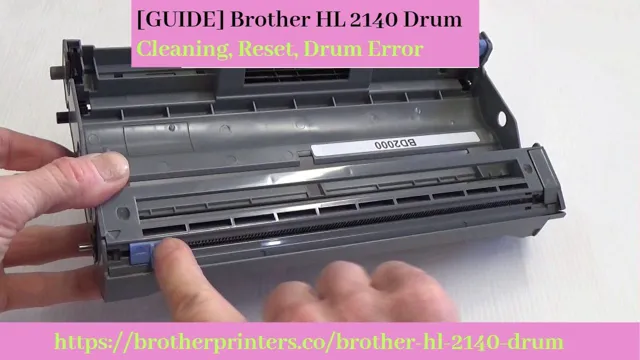
Cleaning the drum of your Brother printer is an essential step in maintaining the quality of your printouts. Here’s a simple step-by-step guide to help you clean your Brother printer’s drum. Firstly, you need to switch off your printer and wait for it to cool down before opening its cover.
Then, gently remove the drum unit and toner cartridge assembly from the printer. Next, use a soft, lint-free cloth to wipe the drum’s surface gently. Be careful not to touch the drum with your fingers as this could leave fingerprints.
If there are any stubborn marks on the drum, use a moistened cotton swab to clean them. Once you’re done, reinsert the drum unit and toner cartridge assembly back into the printer, and close the printer’s cover. Finally, power on the printer and ensure that it’s working correctly.
So, if you’re experiencing print quality issues, don’t ignore them as drum cleaning could solve the problem.
Preparation and precautions
Cleaning the drum of your washing machine is an essential part of maintaining machine hygiene and ensuring long-lasting performance. Before beginning the cleaning process, it’s crucial to take some necessary precautions to avoid any accidents. Firstly, unplug the washing machine from the power source to eliminate any risk of electric shock.
Next, turn off the water supply and disconnect any pipes or hoses. Then, prepare a cleaning solution by mixing equal parts of water and distilled white vinegar. Once everything is in place, it’s time to start the cleaning process.
Add the cleaning solution into the drum and set the washing machine to run a hot cycle. The vinegar helps to deodorize and disinfect the drum, removing any bacteria, mold, or mildew buildup. After the cycle has finished, wipe down the drum with a clean, damp cloth to remove any excess vinegar, residues, and dirt.
Properly dry the drum using a dry towel or air-dry it for a few hours before reconnecting the pipes and hoses and switching the machine back on. By following these simple steps, you can keep your washing machine drum clean and bacteria-free, ensuring that the machine continues to perform at its best.
Cleaning process
Cleaning the drum of your washing machine is an essential task that not only maintains the efficacy of the machine but also ensures the longevity of it. Fortunately, cleaning the drum is a hassle-free task that can be done easily. To start with, remove any clothes or items from the drum and add two cups of white vinegar or a cup of baking soda.
Then set the machine to run on the hottest cycle with the longest spin time. Once the cycle is complete, remove any leftover debris or dirt from the drum using a cleaning solution and a soft-bristled brush. Lastly, wipe the drum with a damp cloth to remove any excess dirt or residue.
By following these simple steps regularly, you can ensure that your washing machine drum remains clean and free of any buildup or residue that can affect its performance. So, keep your washing machine maintained and running smoothly by giving your drum a deep clean every few months.
When to replace the drum
If you own a Brother printer, you’ve probably wondered when to replace the drum. The drum is an essential component of a laser printer, and it’s responsible for transferring the toner onto the paper. Over time, the drum can become dirty or worn out, and this can affect the print quality.
Fortunately, Brother printers have a built-in mechanism for cleaning the drum, which can help extend its lifespan. To clean the drum, simply go to the printer’s maintenance menu and select “clean drum.” However, if you’ve been using your printer for several years and the print quality is consistently poor, it might be time to replace the drum.
Brother recommends replacing the drum every 12,000 pages or so, depending on the model. In general, you’ll notice streaks, spots, or lines on your printouts if the drum needs to be replaced. If you’re unsure whether your drum needs to be replaced, consult your printer manual or contact Brother customer service for assistance.
Indicators that it’s time to replace your drum
Drums are an integral part of your printer as they help with the transfer of toner onto the paper. However, like every other component of your printer, the drum has a lifespan, and it’s crucial to replace it once it reaches the end of its useful life. One of the significant indicators that it’s time to replace your drum includes the print quality.
When you start noticing blurred or faded printouts, it’s more likely that your printer’s drum has reached its end and needs a replacement. Additionally, you might notice streaks or lines appearing on your printouts, indicating that the drum’s surface has worn out, and it’s time to replace it. Another indicator that your drum is due for a replacement is frequent jamming.
As the drum reaches the end of its useful life, it might start emitting electrical discharge, which then leads to more jams. In such instances, you must replace the drum to avoid further printer complications. By replacing your printer’s drum, you can improve the quality of your printouts, reduce the frequency of paper jams, and extend your printer’s useful life.
Tips to prolong drum life
If you want to get the most out of your Brother printer and prolong the life of its drum, there are a few simple steps you can take. Firstly, it’s important to clean the drum regularly. Dust, debris and toner particles can build up on the drum over time, which can cause smudging, streaking and other printing issues.
To clean the drum, use a soft, lint-free cloth to wipe it down gently. In addition, you should make sure that your Brother printer is kept in a clean and dust-free environment. This can help to prevent dust and debris from building up on the drum, as well as other internal components of the printer.
Finally, you should use high-quality toner cartridges that are specifically designed for your Brother printer. Using low-quality or incompatible cartridges can cause damage to the drum and other components, which may lead to costly repairs or replacements down the line. By taking these simple steps, you can help to ensure that your Brother printer runs smoothly and efficiently, and that it lasts for years to come.
Best practices to maintain a clean drum
Maintaining a clean drum is crucial for its longevity and effectiveness. One important tip to prolong the drum’s life is to always empty it after each use. Do not leave debris or residue inside the drum as this can cause corrosion or buildup on the surface which can cause wear and tear.
It is also important to avoid using harsh chemicals that could damage the surface of the drum. Instead, use a mild detergent or soap and water solution to clean the drum. Another best practice is using a soft cloth or sponge to avoid scratching or damaging the drum surface.
By following these simple tips, you can ensure that your drum stays clean, functional, and has a longer lifespan.
Conclusion
In summary, cleaning your Brother printer’s drum is like giving it a spa day – a little TLC goes a long way in keeping it functioning at its best. Just like how a clean house leads to a clear mind, a clean drum leads to clearer and crisper prints. So don’t neglect your printer’s hygiene – give it a good drum cleaning and watch it shine!”
Why cleaning your printer drum is important
Cleaning your printer drum is essential in maintaining optimal print quality and prolonging the lifespan of your printer. Over time, the drum in your printer can accumulate toner and other debris, resulting in poor quality prints and potentially damaging the drum. To prevent this from happening, it’s important to regularly clean your drum with a soft, lint-free cloth and avoid using harsh chemicals or abrasive materials that could scratch or damage the surface of the drum.
Additionally, you should avoid exposing your drum to direct sunlight or extreme heat, as this can cause the surface to warp or crack. By taking the time to care for your printer drum, you’ll ensure that your printer continues to produce high-quality prints for years to come.
FAQs
Why do I need to clean the drum in my Brother printer?
Cleaning the drum in your Brother printer is important because it helps to prevent smudging, streaking, and other printing quality issues. Over time, dirt, dust, and other debris can build up on the drum, causing these issues.
How often should I clean the drum in my Brother printer?
The frequency of drum cleaning will depend on how often you use your printer. As a general rule, it is recommended to clean the drum every time you replace the toner cartridge. If you notice printing quality issues before then, you may need to clean the drum more frequently.
What materials do I need to clean the drum in my Brother printer?
To clean the drum in your Brother printer, you will need a clean, lint-free cloth and a cleaning solution specifically designed for use on printer drums. You can purchase these supplies from most office supply stores or online.
Can I clean the drum in my Brother printer myself, or do I need to take it to a professional?
Most users can safely clean the drum in their Brother printer themselves. However, if you are not comfortable doing so, or if you are concerned about damaging your printer, it is always a good idea to take it to a professional for cleaning and maintenance.