
Who doesn’t love movie nights? But sometimes, it can be a hassle to set up a big, expensive projector in your living room or backyard. That’s where a shoebox projector comes in handy! Yes, you heard it right. With just a few simple materials and an empty shoebox, you can create your mini projector without emptying your pockets.
This DIY guide will walk you through the steps to create your projector, allowing you to relax and kick back with your favorite movies or shows on the big screen. Get ready to impress your friends and family with your innovative skills. So, grab your shoebox, get ready to create, and let’s dive into this DIY Shoebox Projector Guide!
Introduction
Have you ever heard of a shoebox projector? It’s a simple DIY project that can turn any dark room into a makeshift movie theater. All you need is a shoebox, a magnifying glass, a smartphone, and a few basic tools. With just a little bit of effort, you can create a low-cost projector that will allow you to watch movies or videos on a big screen without breaking the bank.
Plus, it’s a fun and educational project that you can complete with your kids or friends. So why not give it a try and create your very own shoebox projector? You might be surprised at just how good it looks, and how much you enjoy using it.
Why make a shoebox projector?
Shoebox projector is a simple and fun DIY project that can be enjoyed by people of all ages. But why would anyone want to make one? Well, there are a number of reasons why making a shoebox projector can be a worthwhile endeavor. For one, it’s a great way to learn about optics and how light behaves.
It’s also a creative way to repurpose materials you may already have at home. Additionally, making a shoebox projector is a fun activity that can be done with friends or family, and the resulting projector can be used to watch movies, TV shows, or even project images from your phone onto a bigger screen. So if you’re looking for a low-cost, fun, and educational project to do this weekend, a shoebox projector might just be the perfect choice for you.
And the best part? You can make it yourself!
What you’ll need
When it comes to starting a new project, having all the necessary tools and resources is essential to ensure its success. The same rule applies when starting a blog. Before you unleash your creative ideas and start writing engaging content, you need to ensure that you have the right tools to make the blogging process more comfortable and more effective.
So, what do you need? Firstly, you need a reliable and user-friendly blogging platform to host your blog. Some of the popular options include WordPress, Blogger, and Tumblr. Secondly, you need a domain name for your blog that will enable your readers to visit your site easily.
You can purchase a domain name from a reputable domain registrar such as GoDaddy or HostGator. Finally, you need quality content ideas and a consistent blogging schedule to keep your readers engaged. By having these essential tools and resources, you can start your blogging journey with confidence and give your readers an unforgettable experience.
Building the Projector
If you’re looking for a fun, inexpensive project to do with the kids, building a shoebox projector is a great idea! All you need is a shoebox, a magnifying glass, and your smartphone. Start by cutting a hole in the end of the shoebox, big enough for the magnifying glass to fit in snugly. Glue the magnifying glass in place, making sure it lines up with the hole.
Next, cut a slot in the other end of the box, so you can slide your phone in and out. Play a video on your phone, turn off the lights, and voila! You’ve got a fun little projector that works surprisingly well. Just make sure to keep your phone nice and steady, or the picture will be shaky.
With just a few simple steps, you can build a shoebox projector that’s perfect for movie night or a rainy day at home. So why not give it a try?
Step 1: Preparing the shoebox
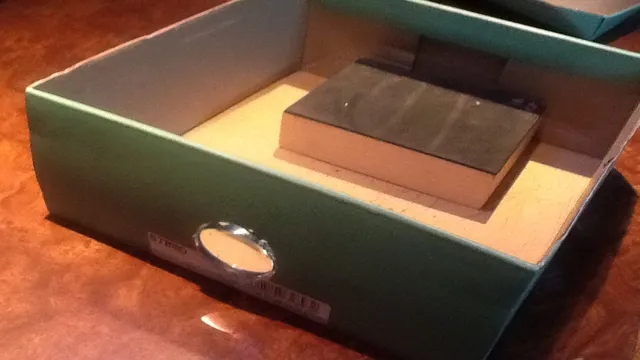
To get started on building a shoebox projector, the first step is to prepare the shoebox itself. You’ll need a shoebox with a removable lid, a magnifying glass, some tape, and a ruler. First, you’ll want to measure the distance from the bottom of the box to where the lens of the magnifying glass will be positioned.
Once you have this measurement, mark the center of the box on both the front and back sides with a pencil. Next, cut a square hole out of the front of the box, using the center mark as a guide. This hole should be slightly smaller than the magnifying glass lens.
Finally, in the center of the back of the box, cut a small hole that is just big enough for your smartphone to fit through. Once you have completed these steps, you’ll be ready to move on to actually building the projector itself.
Step 2: Cutting the lens hole
As you move forward with building your projector, you’ll need to make a precise cut in the center of the lens for optimal projection. Cutting the lens hole can seem daunting, but with the right tools and a steady hand, it’s a relatively straightforward process. First, ensure you have a quiet, well-lit workspace to minimize any mistakes.
Next, mark the center of the lens with a permanent marker or a small piece of masking tape. Then, using a drill with a cutting bit, carefully drill through the lens at the center point. Once the hole is drilled, use a small file to smooth out any rough edges around the cut.
With the lens hole complete, you’re one step closer to a fully functioning projector. Just remember to take your time and be patient with each step to ensure a successful outcome.
Step 3: Attaching the magnifying lens
Now that we have our projector box ready, it’s time to attach the magnifying lens. The lens is what will magnify and project the image from our smartphone, so it’s a crucial step. First, we need to measure the width of the lens and mark the center of the front panel of the box.
Then, using a cutter or a small saw, we can cut out a hole in the center of the panel. Now, we can insert the magnifying lens into the hole from the inside of the box. It’s important to make sure that the lens is centered and snugly fit into the hole.
We can use hot glue or double-sided tape to secure it in place. Once the lens is attached, we can adjust the focus by moving the smartphone closer or further away from the lens. With the lens attached, our projector is starting to take shape, and we’re one step closer to enjoying our favorite movies and shows on the big screen.
Step 4: Creating a projection surface
To create a projection surface, you’ll need to build a projector. And luckily, building a projector is easier than you might think! First, gather all of the necessary materials, including a light source, a lens, and a power source. Next, attach the lens to the light source, making sure that it stays secure.
Then, connect the power source and check to make sure that everything is working properly. Once your projector is complete, you can use it to project images onto any surface – from walls to screens to even the ceiling! Just make sure that your projection surface is smooth and white, so that the image comes out clear and vibrant. With a little bit of creativity and some DIY skills, the possibilities for projection are endless.
So why not start building your own projector today?
Using the Shoebox Projector
If you’re looking for a fun and easy DIY project, making a shoebox projector is a great option. All you need are a few simple materials, including a shoebox, magnifying glass, and a smartphone. With these items, you can create your own projector that allows you to watch videos or movies on a larger screen.
First, cut a hole in the side of the shoebox and glue the magnifying glass to the opposite end. Then, place your smartphone in the box and adjust the focus until the image appears clear. It may take some practice to get the focus just right, but once you do, you’ll be able to enjoy your favorite shows and movies on a larger screen.
The shoebox projector is perfect for a movie night with friends or a family viewing party. Plus, it’s an eco-friendly and budget-friendly option for entertainment. So why not give it a try and see how easy it is to create your own shoebox projector?
Tips for getting the best picture
The Shoebox Projector is an excellent way to create a more immersive viewing experience for your photos. But to get the best picture, there are a few things to keep in mind. First, make sure you have a dark room.
The darker the room, the better the image will appear. Second, use a high-quality lens. A good-quality lens will help your images appear sharper and clearer.
Finally, make sure your projector is at the right distance from the wall. The closer it is, the smaller the image will be, and the further away it is, the larger the image will be. By following these tips, you’ll be able to get the most out of your Shoebox Projector and create stunning images that will impress all of your friends and family.
Examples of what you can project
The Shoebox Projector is a fun and simple way to project images and videos onto a wall or screen. It’s a low-cost DIY project that can be created with materials found around the house, such as a shoebox, magnifying glass, and smartphone. The possibilities for what you can project with this simple device are endless.
You can display photos from your last vacation, watch your favorite TV show or movie, or even have a home movie night with family and friends. With a little creativity, you can also use the Shoebox Projector for educational purposes by projecting diagrams, maps, or charts onto a wall for a classroom presentation. Moreover, you can use it to display artwork during an art exhibition or even to project lyrics during a karaoke night at home.
The Shoebox Projector is a fun and low-key way to add some excitement to your everyday activities, and it’s an excellent way to spend time with loved ones.
Conclusion
In today’s world of high-tech gadgets, a shoebox projector may seem like a blast from the past. But sometimes the simple things can provide the most enjoyment. Whether it’s for a backyard movie night with friends or a nostalgic trip down memory lane with your old family photos, a shoebox projector is the perfect DIY solution for some good old-fashioned fun.
So dust off that shoebox and get ready to create some memories that will last a lifetime!”
FAQs
What is a shoebox projector?
A shoebox projector is a simple DIY device that uses a smartphone and a magnifying glass to project images or videos onto a larger screen.
What materials are needed to make a shoebox projector?
To make a shoebox projector, you will need a cardboard shoebox, magnifying glass, black construction paper, tape, scissors, and a smartphone.
How does a shoebox projector work?
A shoebox projector works by placing the magnifying glass in a hole created in the shoebox lid. The smartphone is then placed inside the shoebox, facing downwards towards the magnifying glass. The image on the smartphone screen is then enlarged and projected onto a wall or screen.
What are some tips for using a shoebox projector?
Some tips for using a shoebox projector include ensuring the room is dark, positioning the projector at the correct distance from the screen or wall, and adjusting the focus to ensure a clear and sharp image. It is also recommended to use a small tripod or stand to keep the projector steady.