
Is your graphics card acting up? Are you experiencing crashes, glitches, or poor performance? Before you give up and buy a new graphics card, try resetting your graphics card driver. This beginner’s guide will show you how to reset your driver to its default settings and get your GPU running smoothly again. Think of resetting your graphics card driver like a factory reset for your phone.
When you reset your driver, you erase any custom settings or tweaks you may have made and revert to the default settings. This can help resolve any conflicts or issues that were causing problems. Resetting your graphics card driver is a simple process, but it can make a big difference in the performance of your system.
With just a few clicks, you can get your GPU back to its default settings and enjoy smoother, more stable performance. So, let’s get started and learn how to reset your graphics card driver.
Why Reset Your Graphics Card Driver?
If you’ve encountered any issues with your graphics display, it might be time to reset your graphic card driver. By resetting the driver, you can clear any bugs or glitches that might be causing display issues, such as blurry or distorted images, flickering screens, or incomplete rendering of certain applications. Updating the driver may also help with issues related to compatibility with newer software versions or games.
Note that resetting your graphic card driver could potentially erase any custom settings or tweaks you’ve made, so it’s important to back up your settings beforehand if possible. In summary, resetting your graphic card driver can help to resolve display issues, and ensure that your system is up-to-date with the latest software and driver versions. So, if you’re having trouble with your graphics display, it might be worth giving your graphics card driver a reset!
Improved Performance
Reset Graphics Card Driver Resetting your graphics card driver is an easy and effective way to improve its performance. Over time, your graphics card driver can become bogged down with excess data and settings, causing it to slow down and perform poorly. By resetting your driver, you can clear out this excess data and give your graphics card a fresh start.
This can lead to improved performance, faster rendering times, and smoother gameplay. Think of it like clearing out clutter in your workspace – when your graphics card driver is free from unnecessary data and settings, it can work more efficiently and effectively. So if you’re experiencing issues with your graphics card performance, it’s worth considering resetting the driver to give it a boost.
Fixing Common Graphics Card Issues
If you have been experiencing issues with your graphics card, resetting your graphics card driver could be the solution. Graphics cards are one of the most important components of your computer, and they are responsible for rendering images, videos, and other visual content. However, like any piece of hardware, they can develop issues over time.
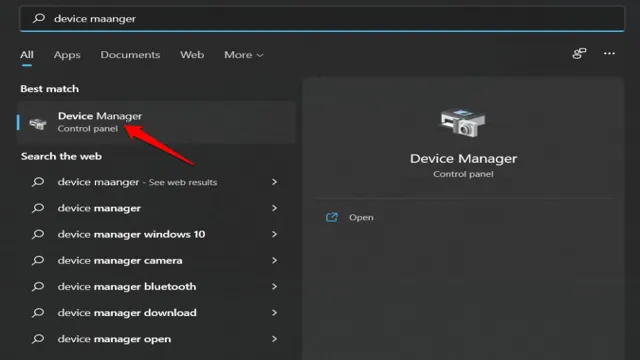
Common issues include blurry images, distorted graphics, and poor resolution. Resetting your graphics card driver can help resolve these issues by restoring it to its default settings. This process can be done easily by accessing the Device Manager on your Windows computer, locating your graphics card driver, and selecting the option to reset it.
So if you are experiencing issues with your graphics card, consider resetting your driver to get your system back to optimal performance.
Step-by-Step Guide to Resetting Your Graphics Card Driver
If you’re struggling with graphics issues on your computer, resetting your graphic card driver could be the solution you need. It’s a simple process that involves uninstalling the current driver and reinstalling a fresh copy. First, visit the manufacturer’s website and download the latest driver for your graphics card.
Then, open the Device Manager and locate your graphics card. Right-click on it and select “Uninstall device.” This will remove the current driver from your computer.
Once that’s done, restart your computer and install the new driver you downloaded earlier. This should resolve any issues you were experiencing with your graphics and ensure that your computer runs smoothly. Don’t forget to regularly update your drivers to avoid any future problems and keep your hardware functioning at its best.
Step 1: Uninstall Current Graphics Drivers
Resetting Your graphics card driver can be a helpful solution if you’re experiencing issues with your graphics card. And the first step to do so is by uninstalling the current graphics driver. It may sound simple, but it’s crucial to ensure that there are no traces of the previous driver left behind, which can cause conflicts with the new driver.
To uninstall the current graphics driver, you can go to the Device Manager, find your graphics card, right-click it, and select “Uninstall Driver.” After the driver is successfully uninstalled, it’s essential to restart your PC to complete the process. Don’t worry if your screen goes black for a moment during the uninstallation process, it’s just your system switching to its basic graphics card driver.
Once your PC restarts, you can proceed to the next step of installing a new graphics card driver.
Step 2: Download and Install Latest Graphics Drivers
Downloading and installing the latest graphics drivers is a crucial step in resetting your graphics card driver. This will ensure that your system has up-to-date software to communicate with your graphics card effectively. Every graphics card manufacturer has a website where you can download the latest drivers, so start by identifying your graphics card model and manufacturer.
Once you have the required information, visit the manufacturer’s website and navigate to the drivers section. Download the latest version of the driver compatible with your system, then run the installation wizard to install the driver. It is advisable to create a system restore point before proceeding with the installation.
This will allow you to revert to the previous state of your system in case anything goes wrong during the installation process. Remember that keeping your graphics drivers up to date is essential for optimal system performance and stability. So, take the time and effort to ensure your graphics card driver is running smoothly with the latest software updates.
Step 3: Restart Your Computer
After you’ve uninstalled your graphics card driver and downloaded the new one, it’s essential to restart your computer. Restarting your computer will ensure the changes you’ve made to your graphics card driver take effect correctly. Additionally, restarting your computer will allow your system to load the new driver and reset any previous configurations.
When you restart your computer, it enables the operating system to load all the system files and drivers from scratch. This way, your system will detect and configure the new graphics card driver correctly. Without a proper restart, you might encounter issues such as lagging, freezing, and other performance problems.
So, before diving into your favorite game or graphics-intensive work project, be sure to restart your computer to guarantee the optimal performance of your graphics card.
Tips for Avoiding Graphics Card Driver Issues in the Future
If you’re tired of dealing with graphics card driver issues, there are a few simple steps you can take to avoid these problems in the future. One effective solution is to reset your graphic card driver periodically. This can help clear any potential conflicts or errors that may have accumulated over time.
In addition, be sure to keep your graphics card drivers up to date. Check for updates regularly and install them as soon as they become available. You may also want to consider using a dedicated utility program to manage your drivers, as this can simplify the process and help ensure that everything stays up to date and running smoothly.
Finally, be sure to maintain your system regularly by clearing cache files, removing unnecessary programs or files, and running regular virus and malware scans. By taking these simple steps, you can keep your graphics card functioning properly and avoid the frustration that comes with driver issues.
Regularly Update Drivers
One of the simplest yet most effective ways to avoid graphics card driver issues in the future is to regularly update your drivers. Outdated drivers can lead to decreased performance, graphical glitches, and even crashes. Thankfully, most graphics card manufacturers offer easy-to-use driver updater programs that can automatically check for and install the latest drivers.
If you prefer to update your drivers manually, you can usually find them on the manufacturer’s website under the support or downloads section. Additionally, it’s a good idea to keep an eye out for any driver updates after you install a new game or software that may require specific driver versions. By regularly updating your drivers, you can ensure that your graphics card performs at its best and avoid any potential issues that may arise from outdated drivers.
Perform Regular Maintenance Checks
Regular Maintenance Checks Graphics card driver issues can be a real pain, but there are steps you can take to avoid them in the future. Performing regular maintenance checks on your system is a great place to start. Set a reminder to check for updates and run virus scans on a weekly basis.
This will ensure that your system is running smoothly and help prevent any potential issues with your graphics card drivers. It’s also important to clean your computer regularly and ensure that it’s free from dust and debris. Overheating can cause problems with your graphics card, so keeping your computer cool and clean is a must.
By taking these simple steps, you can reduce the risk of encountering driver issues and keep your system running smoothly in the long run.
Conclusion and Takeaways
In conclusion, resetting your graphics card driver is like hitting the refresh button on your computer’s visual capabilities. Just like how a cup of coffee can wake you up and improve your productivity, resetting your graphics card driver can give your computer the boost it needs to run smoothly and efficiently. So, if you want your visual experience to be at its best, don’t hesitate to reset that graphics card driver and see the difference it can make!”
FAQs
How do I reset my graphic card driver?
To reset your graphic card driver, first open the Device Manager. Then, find your graphic card driver under the display adapters section and right-click on it. Select “Uninstall device” and restart your computer. The driver will automatically be reinstalled upon reboot.
Why would I need to reset my graphic card driver?
You may need to reset your graphic card driver if you are experiencing graphical issues such as display artifacts, freezing, or crashes. Resetting the driver can help to resolve these issues.
Can I revert back to the previous version of my graphic card driver after resetting?
Yes, you can revert back to the previous version of your graphic card driver after resetting by downloading and installing the previous version from the manufacturer’s website.
What if resetting my graphic card driver doesn’t fix the issue?
If resetting your graphic card driver doesn’t fix the issue, try updating to the latest driver version. If that still doesn’t work, the issue may be with the hardware and you may need to contact the manufacturer for support.