
Have you ever tried to print an important document, only to be left with annoying vertical lines and streaks on the paper? It’s frustrating, to say the least. But don’t worry, because you’re not alone. Many HP LaserJet Pro MFP printer owners have experienced this issue and it can be fixed.
In this blog post, we’ll explore what causes these vertical lines and streaks and provide some tips on how to fix them. So, grab a cup of coffee and let’s dive right in.
Possible Causes
If you own an HP LaserJet Pro MFP and notice vertical lines or streaks on your printouts, there are a few possible causes. One of the most common causes is a dirty printer. Dirt and debris can accumulate on the printer’s rollers, causing them to become misaligned and produce uneven prints.
Another cause could be a faulty toner cartridge. If your cartridge is running low or has not been replaced in a while, it may be causing the print quality to suffer. Additionally, electrical interference or a damaged printer head could be the issue.
It’s important to thoroughly inspect your printer and troubleshoot the problem to determine the root cause. In some cases, it may be necessary to replace the printer components. By addressing the issue promptly, you can ensure that your HP LaserJet Pro MFP prints high-quality documents every time.
Ink Cartridge Issues
Ink cartridges are essential components of every printer. However, sometimes, they can be quite frustrating, especially when they start to malfunction. There are several possible causes of ink cartridge issues that can lead to poor print quality or difficulty in printing.
One common cause is when the ink cartridge is running low on ink. This can lead to streaky, faded or incomplete prints. Another common cause is when the ink cartridge is clogged, preventing the ink from flowing freely onto the paper.
Additionally, using non-original ink cartridges or refilling cartridges with low-quality ink can cause ink cartridge issues as well. In such cases, it may be necessary to clean the ink cartridge or replace it altogether to restore optimal printing quality. By taking proper care of your ink cartridges, you can enjoy high-quality prints without any trouble.
Toner Cartridge Issues
If you’re experiencing issues with your toner cartridge, there could be a few possible causes. One common issue is low toner levels. If the toner level is low, your printer may have difficulty printing or may produce faint or blurry prints.
Another possible cause is a clogged toner cartridge. This can happen if the cartridge hasn’t been used in a while or if the printer isn’t used frequently. A damaged or defective toner cartridge can also cause issues.
The cartridge may have been dropped or mishandled during installation, causing damage to the internal components. It’s also possible that the cartridge was not installed correctly, causing printer malfunctions or low-quality prints. In any case, it’s important to troubleshoot the issue and determine the root cause before replacing a toner cartridge prematurely.
Dirty Print Heads
Dirty print heads can be caused by a variety of issues. One common reason is simply using the printer too much without properly maintaining it. Over time, dust and dirt can accumulate on the print heads, causing them to become clogged and producing poor quality prints.
Another potential issue is using low-quality ink or paper, which may leave residue on the print heads. Additionally, not using the printer often enough can cause the ink to dry out and create blockages in the print heads. Ensuring that you regularly clean and maintain your printer, use high-quality ink and paper, and consistently use your printer will help prevent dirty print heads and ensure high-quality prints every time.
How to Fix Vertical Lines and Streaks
If you’re experiencing vertical lines or streaks when printing with your HP LaserJet Pro MFP, don’t worry. There are a few quick and easy fixes you can try. First, check your printer’s toner level and replace if necessary.
Low toner can cause streaks and lines on your prints. Next, try cleaning the printer’s imaging drum with a soft, lint-free cloth. It’s important to handle the imaging drum gently and avoid touching it with your fingers.
If these fixes don’t work, you may need to replace the imaging drum or fuser unit. It’s recommended to consult your printer’s manual or contact HP customer support for assistance with these steps. Remember, regularly maintaining your printer can help prevent these issues from occurring in the first place!
Clean the Print Heads
If you’re experiencing vertical lines and streaks on your printed documents, it’s likely time to clean the print heads. Print heads can become clogged or dirty over time, leading to these unsightly printing issues. Luckily, cleaning the print heads is a straightforward process that can be done in just a few easy steps.
First, open the printer software on your computer and look for an option to clean the print heads. This option may be located in the maintenance or tools section. Once you start the cleaning process, the printer will likely print a series of test pages to ensure that the print heads are working properly.
After the cleaning process is complete, you should notice a significant improvement in print quality. Remember to regularly clean your print heads to keep your printer running smoothly and to avoid future printing issues.
Replace Toner or Ink Cartridges
If you’re seeing vertical lines and streaks on your printed pages, the culprit is likely the toner or ink cartridge. Over time, these cartridges can become worn or clogged, causing the lines and streaks to appear. The good news is that replacing the cartridge is usually a simple and straightforward process.
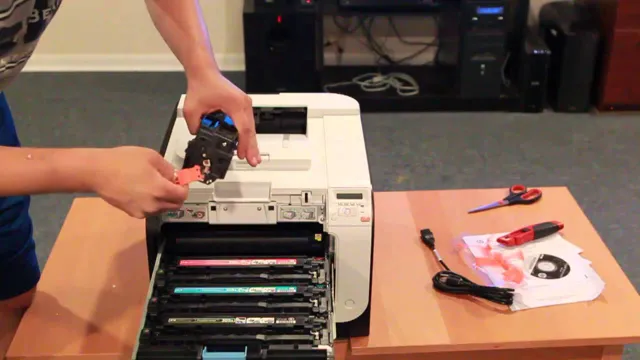
Start by checking your printer’s manual to determine the correct replacement cartridge. Once you have the new cartridge, turn off your printer and locate the old one. Remove it carefully, taking note of any tabs or clips that need to be released.
Then, simply insert the new cartridge in its place, making sure it clicks securely into place. Finally, turn on your printer and run a test print to ensure that the lines and streaks have disappeared. By replacing your toner or ink cartridge, you can get your printer back to producing high-quality prints in no time.
Calibrate the Printer
One common printing issue that many people face is the appearance of vertical lines and streaks on the printed document. This can be caused by clogged print heads or improper ink placement, among other things. Fortunately, fixing this issue is not very difficult and can be done through a process called printer calibration.
Calibration involves adjusting the printer settings to ensure accurate and consistent ink placement. One way to calibrate your printer is to use the built-in calibration tools provided in the printer settings. You can also manually adjust the printer settings by printing a calibration page and making adjustments based on the results.
By properly calibrating your printer, you can easily fix vertical lines and streaks and achieve a high-quality print every time. So, if you are experiencing this issue, don’t panic. Just take a few minutes to calibrate your printer and you will be back to printing crystal clear documents in no time.
Preventing Vertical Lines and Streaks
The HP LaserJet Pro MFP may produce vertical lines or streaks when printing, which can be a frustrating problem. There are a few causes for this issue, but the most common one is that toner or debris is stuck to the printer’s imaging drum, which transfers the image onto the paper. A quick fix is to remove the imaging drum and gently clean it with a soft, lint-free cloth.
Another cause could be that the toner cartridge is running low, so replacing it can solve the problem. Additionally, paper jams or damaged rollers may cause vertical lines or streaks. Ensure that paper is loaded correctly and that the printer rollers are clean and in good condition.
These simple steps may help prevent this issue from occurring, allowing for smooth and high-quality printing every time. Don’t let vertical lines or streaks ruin your prints, take preventative measures to keep your printer running smoothly and optimally!
Regular Printer Cleaning
Regular printer cleaning is crucial if you want to prevent vertical lines and streaks from appearing on your printed documents. Over time, dust, debris, and ink can accumulate on the print heads, causing irregularities in the printing process. It’s essential to clean your printer at least every three months or if you notice any visible signs of dirt buildup.
To clean your printer, start by turning it off and unplugging it from the wall socket to avoid any electrical accidents. Next, locate the print heads and carefully wipe away any settled dust or ink residue using a soft cloth or a cotton swab. Avoid using any cleaning agents or alcohol-based solutions as they can damage the print heads.
Lastly, plug your printer and turn it back on to test its functionality. With regular cleaning, you can extend the life of your printer and enjoy better quality prints every time.
Using High-Quality Ink and Toner Cartridges
As technology advances, it’s becoming easier to print high-quality images and documents from home. However, the key to achieving a professional-looking print job is using high-quality ink and toner cartridges. One of the most common issues that arise when printing with low-quality cartridges is vertical lines and streaks on the page.
These lines occur when the ink or toner is not distributed evenly on the page, leaving visible streaks that can be frustrating and unsightly. To prevent this from happening, invest in high-quality cartridges that are designed to work specifically with your printer model. High-quality cartridges not only produce better results but are also more reliable and have a longer lifespan, saving you time and money in the long run.
So, if you want to avoid dealing with vertical lines and streaks in your prints, start investing in high-quality ink and toner cartridges.
Conclusion
In conclusion, if the vertical lines or streaks on your printed documents resemble a modern art piece rather than crisp, clean text, it may be time to address the issue with your HP LaserJet Pro MFP. Don’t let these lines ruin your professional image – seek out solutions such as cleaning the printer heads or replacing the toner cartridge. Remember, in the world of printing, vertical lines are only suitable for ruled notebook paper.
FAQs
What causes vertical lines or streaks in the printouts produced by HP LaserJet Pro MFP?
Vertical lines or streaks in the printouts can be caused by various issues such as a dirty print head, damaged drum or fuser unit, low toner, or faulty ink cartridge.
How to clean the print head of HP LaserJet Pro MFP to fix vertical lines or streaks?
You can clean the print head by running the “clean print head” utility from the printer software. If that doesn’t work, gently wipe the print head with a soft, lint-free cloth soaked in distilled water, and repeat the cleaning process.
What to do if replacing the ink cartridge doesn’t fix vertical lines or streaks printing issue in HP LaserJet Pro MFP?
If replacing the ink cartridge doesn’t fix the issue, check for damage to the drum or fuser unit. In such a case, you may need to replace these components.
How can I ensure that the toner levels are not causing lines or streaks in HP LaserJet Pro MFP prints?
You can ensure that the toner levels are adequate by checking the printer software or control panel. If the toner levels are low, replace the cartridge to avoid lines or streaks in the printouts.