
Setting up a printer, especially a professional-grade one like the HP 5200, can be a little intimidating. With so many buttons and functions, it’s easy to feel overwhelmed. But fear not! In this blog post, we’ll guide you through the process of setting up your HP 5200 printer.
We’ll cover everything from unboxing the printer to connecting it to your computer or network. By the end of this guide, you’ll be ready to start printing with confidence. So let’s dive in and get your HP 5200 up and running!
Unboxing and Installation
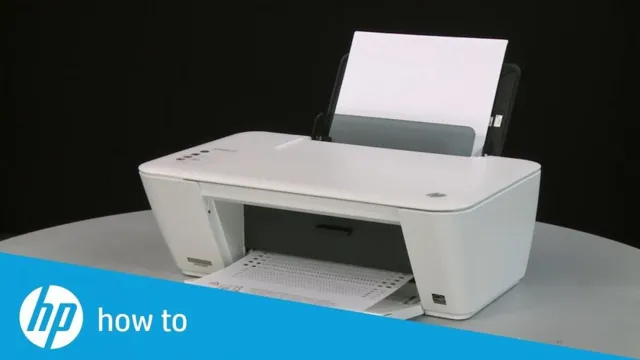
Setting up your new HP 5200 printer can be a breeze with the right steps and information. When unboxing your printer, make sure to carefully remove all packaging materials and accessories, including the power cord, USB cable, and ink cartridges. The printer may also come with a Quick Start guide to help you through the setup process.
Before installing any software, ensure that your computer is compatible with the printer and that you have the correct drivers downloaded. Once you’ve powered on the printer and connected it to your computer, you can follow the on-screen prompts to install the necessary software and configure the printer settings. Don’t forget to align your cartridges and run a test print to ensure that your printer is in working order.
With these simple steps, your HP 5200 printer setup is complete and ready to use for all your printing needs.
Step-by-step instructions for setting up the HP 5200 printer
Unboxing and Installation of the HP 5200 Printer Are you ready to set up your new HP 5200 printer? Let’s get started! Firstly, unbox the printer and check that all the components are present. You should have the printer itself, the power cord, USB cord, toner cartridge, and start-up guide. Next, remove the protective tapes and covers from the printer and plug in the power cord.
The printer will automatically power on, and you’ll see the “Ready” message on the display panel. Now, you need to insert the toner cartridge. Open the front cover of the printer, and remove the protective cover from the cartridge.
Hold the cartridge handle and gently shake it from side to side to distribute the toner. Next, insert the toner cartridge into the printer until it clicks into place. Close the front cover, and you’re ready to load the paper.
To load paper, slide out the tray located at the bottom of the printer. Adjust the paper guides to fit the paper size and type that you want to use. Ensure that the paper is loaded neatly and not wrinkled.
Push the tray back into place, and you’re all set! Finally, connect the printer to your computer using the USB cord. Your computer should automatically install the necessary drivers for the printer. If not, follow the on-screen instructions to install the drivers from the CD that came with the printer.
Congratulations! You’ve successfully unboxed and installed your HP 5200 printer. Now, you’re ready to start printing high-quality documents and images.
Connecting to Wi-Fi
If you have an HP 5200 printer, setting it up to connect to your home or office Wi-Fi network can be a bit confusing. However, once you successfully connect your printer to the network, you’ll be able to print from any device that’s also connected to it. To connect your HP 5200 printer to your Wi-Fi network, first, make sure that your printer is turned on and that it’s within range of the Wi-Fi signal.
Then, navigate to the printer’s settings menu and select the “Network” or “Wireless” option. From there, choose the option to “Add a New Network” or “Connect to Wi-Fi,” and enter the network name and password when prompted. Afterward, your HP 5200 printer should be successfully connected to your Wi-Fi network and ready to use.
Setting up your HP 5200 printer to connect to Wi-Fi may take a few minutes, but it’ll save you a lot of time and hassle in the long run.
How to connect the printer to a wireless network
Connecting a printer to a wireless network is a convenient and efficient way to make printing effortless. To get started, make sure that your printer and Wi-Fi router are within range and turned on. Next, access your printer’s settings and search for the Wi-Fi setup option.
Select your Wi-Fi network from the list of available networks and enter the password. Once you’ve entered the correct password, your printer will attempt to connect to the network. This process may take a few minutes, so be patient.
When the connection is successful, your printer should display a message confirming its establishment. Voila! You’re now ready to start printing wirelessly. May your print jobs be quick and easy from here on out.
Printing from Mobile Devices
If you’re looking to print from your mobile device using an HP 5200 printer, you’re in luck. Setting up your printer for mobile printing is easy, and it can save you a lot of time and hassle. First, make sure your printer is connected to the same Wi-Fi network as your mobile device.
Then, download the HP Smart app to your mobile device. The app is available for both iOS and Android devices and can be downloaded for free from the app store. Once you have the app installed, open it up and follow the on-screen instructions to add your printer.
You’ll need to enter your printer’s model number and connect it to your Wi-Fi network. Once your printer is connected, you’ll be able to print directly from your mobile device by selecting the HP 5200 printer from the list of available printers. With mobile printing, you can easily print documents, photos, and more from anywhere, without the need for a computer.
Instructions for printing from smartphones and tablets
Have you ever been in a situation where you needed to print something from your mobile device but didn’t know how? Well, fear not, as printing from smartphones and tablets has become easier than ever before. First and foremost, you need to ensure that your mobile device is connected to the same Wi-Fi network as your printer. Once that is confirmed, you can download and install the printer software on your device – this can typically be found in the app store.
Once the software is installed, select the document or image you want to print and choose the print option. Voila – your document will be sent wirelessly to the printer, ready for you to pick up! It’s important to note that not all printers come with software that is compatible with mobile devices, so make sure to research before purchasing. With these simple instructions, you’ll never have to worry about printing from your mobile device again.
Happy printing!
Troubleshooting and Maintenance
When it comes to setting up your HP 5200 printer, there are a few things that you need to keep in mind to ensure everything goes smoothly. Firstly, make sure that the printer is properly connected to your computer or network. Check the cables to ensure they’re securely attached, and verify that your computer recognizes the printer.
You may also need to download and install the appropriate printer drivers from the HP website to ensure proper communication between your devices. Once the printer is set up and working properly, it’s important to perform regular maintenance to keep it running smoothly. This includes cleaning the interior of the printer, checking for any jams or paper obstructions, and replacing any worn or damaged parts.
Taking care of your HP 5200 printer will ensure that it lasts for years to come and produces high-quality prints every time.
Common issues and solutions for the HP 5200 printer
If you’re using an HP 5200 printer, you may run into a few common issues that are quite easy to fix. One of the most common problems is printing blank pages. If you’re experiencing this issue, it’s worth checking to see if the toner cartridge is empty or needs to be replaced.
Another issue you might come across is paper jams. To solve this problem, make sure to remove any jammed paper from the printer carefully, without tearing it or leaving any bits behind. You can also try cleaning the rollers to ensure smooth paper feed.
If your printer isn’t turning on at all, there may be an issue with the power source or cable. Double-check to make sure the printer is properly plugged in and that the power outlet is working correctly. With regular maintenance, such as cleaning the printer heads and replacing the toner and paper regularly, your HP 5200 printer should remain in good working order for many years to come.
Tips for maintaining and prolonging the printer’s lifespan
As a printer owner, you want your device to last as long as possible. Proper maintenance and troubleshooting can go a long way in keeping your printer in good shape. One of the most crucial things you can do is regularly clean your printer’s parts and components to avoid buildup and blockages.
It’s also essential to use high-quality ink or toner and compatible cartridges to prevent damage to the printer’s printhead. If you encounter issues with your printer, such as a paper jam or connectivity problems, troubleshoot and resolve them immediately rather than continuing to use the printer. Regularly updating printer drivers and firmware can also help prevent issues and improve performance.
Remember, taking care of your printer can extend its lifespan significantly and save you money in the long run.
Conclusion
In conclusion, setting up the HP 5200 printer is as easy as 1-2-3! With its user-friendly interface and straightforward installation process, you’ll be up and running in no time. Plus, with its high-quality printing capabilities, you’ll be able to produce documents and graphics that are sure to impress. So don’t wait any longer, get your HP 5200 printer set up today and start printing like a pro!”
FAQs
How do I set up my HP 5200 printer?
To set up your HP 5200 printer, first make sure it is connected to your computer or network. Then, download and install the printer driver software from the HP website. Follow the on-screen prompts to complete the setup process.
My HP 5200 printer is not printing. What can I do?
If your HP 5200 printer is not printing, first check that it is turned on and connected to your computer or network. Next, check for any error messages or warnings on the printer display or computer screen. You may also try restarting the printer and/or your computer.
How do I replace the toner cartridge on my HP 5200 printer?
To replace the toner cartridge on your HP 5200 printer, first turn off the printer and unplug it from the power source. Open the front cover of the printer and locate the toner cartridge. Release the cartridge by pressing the button or lever and pulling it out. Install the new toner cartridge by sliding it into the slot until it clicks into place.
My HP 5200 printer is printing blurry or faded pages. What should I do?
If your HP 5200 printer is printing blurry or faded pages, first check that the toner cartridge is not low or empty. You may also need to clean the printer’s imaging drum or perform a calibration test. Refer to the printer’s user manual or online support resources for specific instructions.