
If you’re building or upgrading your PC, you might be wondering whether to use the motherboard HDMI or the GPU HDMI. This can be confusing, especially if you’re not familiar with the concept of integrated graphics and dedicated graphics. In a nutshell, integrated graphics are built into the CPU and use the motherboard connection, while dedicated graphics (also known as a graphics card or GPU) have their own HDMI ports.
Choosing between the two options can have a significant impact on your system’s performance and overall display quality. In this blog, we’ll go over the differences between motherboard and GPU HDMI connections, and which one is best for you. So whether you’re a gamer or a casual user, read on to find out everything you need to know about using motherboard and GPU HDMI.
Why Use Both HDMI Ports?
When it comes to using both your motherboard HDMI and GPU HDMI ports, there are a couple of different reasons why you might want to do so. For starters, using both ports can allow you to connect multiple displays to your computer, which can be great for multitasking or even gaming. Additionally, some motherboards and GPUs may have different capabilities or features, so using both can give you access to all of the options available to you.
Of course, in order to use both ports, you’ll need to make sure that both are properly configured and enabled in your system settings. By doing so, you can enjoy the benefits of having multiple display options and the ability to take full advantage of your system’s hardware capabilities.
Maximizing Monitor Efficiency
If you have two HDMI ports on your monitor, it’s worth utilizing both to maximize efficiency. By connecting two devices, such as a computer and a gaming console, you can easily switch between the two without having to constantly unplug and replug cables. Additionally, you can have two screens displayed simultaneously, allowing for multitasking without having to constantly switch between tabs or windows.
By using both HDMI ports, you’ll save time and increase productivity. The added bonus is that it’s so simple to do, you’ll be amazed at how much easier it makes your day-to-day life. So, don’t let that second HDMI port go to waste!
Avoiding Connection Issues
If you have ever wondered why your device has two HDMI ports, wonder no more! Using both HDMI ports offers a lot of benefits, from reducing connection issues, improving video quality to using multiple monitors. You can have your devices set up so that they complement one another to achieve the best experience. One way to benefit from both HDMI ports is to use a two-monitor setup.
Some laptops that come with both HDMI ports allow you to extend your screen, giving you more screen real estate. This could be really useful for work, gaming, and entertainment purposes. Another benefit of using both HDMI ports is that you can switch between devices utilizing the same display.
So, using both HDMI ports isn’t just about improving quality, but it adds value to your overall viewing experience.
Connection Process
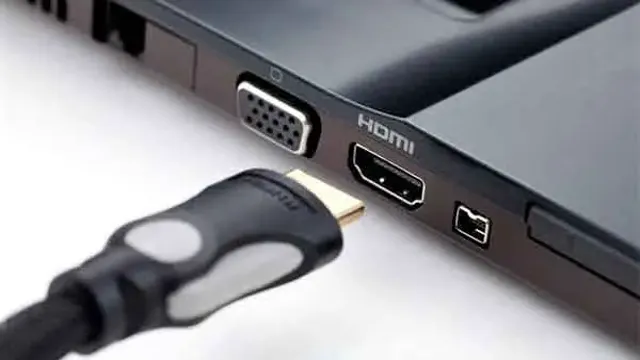
Are you wondering how to use your motherboard HDMI and GPU HDMI at the same time? It’s actually a straightforward process. Firstly, make sure your computer is turned off and unplugged from the power source. Then, locate the HDMI ports on both your motherboard and GPU.
The motherboard HDMI port is usually located towards the bottom of your motherboard, while the GPU HDMI port is located on the back of your graphics card. Next, connect your monitor to the GPU HDMI port for better graphics performance. If you want to use both ports simultaneously, you’ll need to enable integrated graphics in your computer’s BIOS settings.
To do this, start by pressing the delete key or F2 during the boot-up process to enter the BIOS. Navigate to the ‘Integrated Peripherals’ section and locate the ‘Onboard Graphics’ or ‘Integrated Graphics’ option, and set it to ‘Enabled’. Once you’ve saved the changes and exited BIOS, start your computer, and both the motherboard and GPU HDMI ports should be active.
You can now plug in a second monitor to the motherboard HDMI port and enjoy the benefits of dual displays. Keep in mind that enabling integrated graphics may affect your computer’s overall performance, so it’s recommended to use the GPU HDMI port for gaming or graphic-intensive activities. In summary, using both your motherboard and GPU HDMI ports is easy and can be beneficial for dual display setups.
Identify Your Ports
When it comes to connecting devices to your computer, one of the first things you need to do is identify which ports you need to use. Most newer devices use USB ports, while older ones may use serial or parallel ports. It’s important to determine which type of port your device requires before attempting to connect it to your computer.
Additionally, some devices may require specific software or drivers to be installed before they can be properly recognized by your computer. Regardless, once you identify which port you need to use and ensure that your device is properly set up, you should be able to connect and use your device without issue. So whether you’re using a printer or a keyboard, make sure you know which port to connect it to.
Connect Your Display
If you’ve recently purchased a new display screen, you’re going to want to connect it to your devices to really get the most out of it. The connection process can vary depending on the type of display you have and the device you want to connect it to. For example, if you have a desktop computer, you’ll need to connect the display screen using a VGA, HDMI, or DVI cable.
On the other hand, if you have a laptop, you might need to connect the display using a Thunderbolt or USB-C cable. Some displays even have wireless connectivity options, allowing you to connect your devices through Wi-Fi or Bluetooth. Whatever option you choose, it’s important to make sure that both the display and the device are powered off before making any connections.
Once you’ve connected the display, you can power on both devices and adjust the settings to optimize your viewing experience. By taking the time to properly connect your display, you’ll be able to enjoy all the benefits of a larger and clearer screen for work or play.
Configure Your Display Settings
When it comes to configuring your display settings, there are a few important steps to take in order to ensure you get the best possible viewing experience. The first and most crucial step is to check your computer’s graphics card and ensure that it is able to support the resolution and refresh rate that you desire. Once you have confirmed that your computer can handle your desired settings, you will need to connect your display to your computer using the appropriate cables.
You will then need to access your computer’s display settings and configure your resolution, refresh rate, and other settings to your liking. It is worth noting that different types of displays may require different settings, so it is important to do some research on your specific model to ensure that you get the most out of your viewing experience. Overall, taking the time to properly configure your display settings can greatly enhance your overall computing experience and allow you to enjoy high-quality visuals and graphics.
Troubleshooting Tips
If you’re confused about how to use your motherboard HDMI and GPU HDMI, don’t worry, you’re not alone. The first thing to understand is that the HDMI port on your motherboard is connected to the integrated graphics processor on your CPU, while the HDMI port on your GPU is connected to the dedicated graphics processor on your graphics card. So, if you want to use your GPU to power your display, you’ll need to connect your monitor to the HDMI port on your graphics card.
To avoid any conflicts, it’s important to ensure that your graphics drivers are up to date. If you’re experiencing any problems, such as a blank screen or poor performance, it’s worth checking that your graphics card is properly installed and seated in its slot. You can also try resetting your BIOS settings to their default values, as this can sometimes fix issues with display output.
Another thing to keep in mind is that some motherboards automatically disable the integrated graphics processor when a dedicated graphics card is detected. If this is the case for your system, you may need to enable the integrated graphics processor in your BIOS settings if you want to use the motherboard HDMI port. In summary, if you want to use your GPU to power your display, make sure to connect your monitor to the HDMI port on your graphics card.
Check that your graphics drivers are up to date, ensure your graphics card is properly installed and seated, and consider adjusting your BIOS settings if necessary. With a bit of troubleshooting, you’ll be up and running in no time.
Display Not Detected
If you’re facing the issue of “Display not detected,” then there are a few troubleshooting tips that you can try to resolve the issue. Firstly, check all the cables are properly connected between the monitor and the computer. Sometimes, it may appear as if the monitor is not detected when cables are loose or not connected correctly.
Secondly, try connecting the monitor to a different port on your computer, or try connecting it to another device to see if it detects. Additionally, check for any updates for your display drivers and install them if necessary. It can be the case that outdated software is causing the problem.
If none of these tips work, you may want to consider taking your computer and monitor to a professional for further inspection. Remember that patience is key when troubleshooting tech issues. With a bit of persistence, you should be able to find a solution to the “display not detected” problem.
Limited Resolution Options
Limited Resolution Options can be a frustrating issue if you’re trying to view videos or images in high definition and experiencing poor quality. If you’ve tried adjusting the resolution settings on your device, there are a few additional troubleshooting steps you can take. Firstly, check to make sure that your internet connection is strong and stable.
A weak connection can lead to limited resolution options. Additionally, try clearing your cache and cookies, which can sometimes resolve issues with viewing media. If none of these solutions work, it may be worth consulting the manufacturer or seeking assistance from a technical expert.
Don’t let limited resolution options get you down – with a little extra effort and attention, you can get back to enjoying high-quality media in no time!
Benefits of Dual HDMI Connection
If you’re wondering how to use your motherboard HDMI and GPU HDMI simultaneously, the answer lies in the benefits of dual HDMI connection. By connecting both HDMI ports, you can maximize your display experience by having two monitors connected to your computer, allowing you to multitask and increase your productivity. Additionally, utilizing both HDMI ports can enhance your gaming experience by enabling you to use one monitor to display the gameplay and the other to monitor chats, game guides, or other supplementary information to help you perform your best.
Furthermore, combining both HDMI ports can increase your video and photo editing abilities, as you can have one screen devoted to the editing program and the other screen showing the final product. Overall, using both your motherboard and GPU HDMI ports can have numerous benefits, especially when it comes to multitasking, increasing your productivity, and providing a higher quality computing experience.
Conclusion
In conclusion, using both the motherboard HDMI and GPU HDMI can lead to a stellar display experience. Utilizing the motherboard HDMI is perfect for general use such as web browsing and office work, while the GPU HDMI allows for high-end gaming and video production. Ultimately, it’s all about finding the balance between the two and selecting the appropriate HDMI source based on the task at hand.
So go forth, fellow techies, and unleash the full potential of your computer’s display capabilities with these handy HDMI ports – your eyes will thank you!”
FAQs
Can I use both the motherboard HDMI and GPU HDMI at the same time?
Yes, you can use both the motherboard HDMI and GPU HDMI at the same time. However, the motherboard HDMI will only output the video signal from the integrated graphics, while the GPU HDMI will output the signal from the dedicated graphics.
How do I switch between the motherboard HDMI and GPU HDMI?
To switch between the motherboard HDMI and GPU HDMI, you need to access your BIOS settings and change the “Primary Display” option to either “Integrated Graphics” (for the motherboard HDMI) or “PCIe Graphics” (for the GPU HDMI).
Why is my GPU HDMI not working even though it’s connected?
There are a few possible reasons why your GPU HDMI may not be working, such as outdated drivers, faulty cable, or incorrect BIOS settings. Try updating your GPU drivers, checking the cable connection, or resetting your BIOS settings to default.
Can I connect multiple monitors to both the motherboard HDMI and GPU HDMI?
Yes, you can connect multiple monitors to both the motherboard HDMI and GPU HDMI. However, keep in mind that the number of displays supported may vary depending on your system’s hardware and graphics card capabilities. It’s recommended to use a dedicated graphics card for multiple monitor setups.