
Removing a GPU from your motherboard is a task that can seem daunting if you’ve never done it before. Perhaps you need to upgrade your graphics card or maybe there’s something wrong with your current GPU, either way, it’s essential to know how to remove it properly. Once you know how to do this, you can carry out necessary hardware upgrades with confidence, regardless of your experience level.
In this article, we’ll provide step-by-step instructions to guide you through the process of safely removing your GPU from your motherboard. By the end, you’ll be able to carry out this task like a pro!
Tools needed: Screwdriver, Anti-static wrist strap
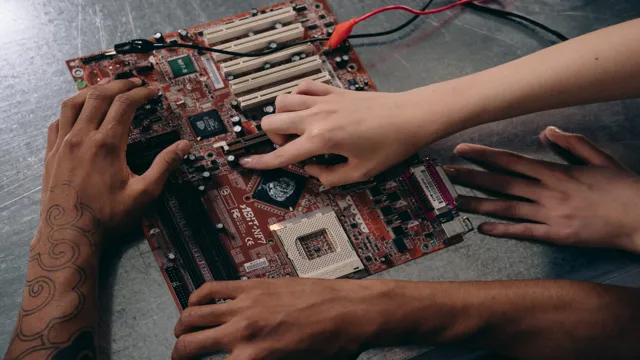
If you’re looking to upgrade your graphics card or replace a malfunctioning one, you may need to know how to remove it from your motherboard. Luckily, it’s a relatively simple process that only requires a screwdriver and an anti-static wrist strap to avoid any accidental damage. First, locate the graphics card on your motherboard – it’s usually the biggest card and will be connected to your monitor.
Next, locate the screw or screws holding the card in place and remove them. Carefully push down on the clip or lever holding the graphics card in place and gently rock it back and forth until it comes loose. Once it’s dislodged, hold it by the edges and pull it straight out of the slot, being careful not to touch the circuitry.
Congratulations, you have successfully removed your graphics card with minimal hassle! Now you’re ready to install your new one.
Shut down and unplug your computer
When it comes to shutting down and unplugging your computer, there are a few things you should keep in mind to ensure your computer stays safe and well-maintained. First things first – make sure you save any important files and close down all programs before shutting down your computer. Once you’ve done that, shut down your computer through the proper channels (usually via the Start menu).
Then, it’s important to unplug your computer, as leaving it plugged in can increase the risk of damage due to power surges or other unexpected electrical issues. To do this, you’ll need a screwdriver to access the back of your computer and unplug any cords that are attached. It’s also important to wear an anti-static wrist strap while doing this to avoid any damage to your hardware due to static electricity.
By following these steps, you can ensure your computer stays safe and well-maintained for the long run.
Remove the side panel of your computer case
Removing the side panel of your computer case can seem overwhelming but fear not, with the right tools and precautions, the process is quite simple. Firstly, ensure that you have a screwdriver and anti-static wrist strap on hand to prevent damage or electrical discharge. Next, locate the screws on the back of the case that hold the side panel in place and carefully unscrew them.
Once the screws have been removed, gently slide the side panel off the case. It’s important to note that some cases may have additional locking mechanisms requiring a bit more effort to remove the panel. Removing the side panel allows for easy access to the inside of the computer, making it easier for upgrades or cleaning.
Don’t be intimidated, with the right tools and method, removing the side panel of your computer case is a breeze.
Locate the graphics card on the motherboard
Locating the graphics card on the motherboard can be a bit tricky, but with the right tools and knowledge, it can be done easily. Firstly, you will need a screwdriver and anti-static wrist strap to prevent any damage to the motherboard. To locate the graphics card, you need to look for a long slot on the motherboard with a lock at the end.
This slot is called the PCIe slot, and it is where the graphics card plugs in. Some graphics cards may require an additional six or eight-pin power connector, so make sure to check for that as well. Once you locate the PCIe slot, gently insert the graphics card into the slot, making sure the lock clicks into place.
Finally, use the screwdriver to secure the graphics card onto the case’s backplate using the screws provided. With these simple steps, you can easily locate and install the graphics card onto the motherboard, enhancing your computer’s performance.
Removing the GPU
If you’ve decided to upgrade your graphics card or your current card is failing, you might need to remove your GPU from your motherboard. While it might seem intimidating at first, removing a graphics card is relatively straightforward. The first step is to turn off and unplug your computer, then locate the graphics card, which is usually inserted into the PCI-Express slot on your motherboard.
Then, to remove the card, press down on the plastic clip at the end of the slot to release the card, and gently pull the card out of the slot. You might need to wiggle it a bit to loosen it, but don’t force it. Once it’s out, you can replace it with a new card or leave the slot empty.
Remember to replace the case cover and plug in your computer before turning it back on. With these simple steps, you can easily remove a graphics card from your motherboard and upgrade your gaming experience.
Disengage the locking mechanism
When it comes to removing your GPU, it’s important to disengage the locking mechanism first. This will prevent any potential damage to your graphics card and ensure a smooth removal process. To start, make sure your computer is shut down and unplugged from the power source.
Then, locate the locking mechanism on your GPU, which may vary depending on the model. Most GPUs will have a lever or latch that needs to be pushed or pulled to disengage the lock. Once the lock is released, gently pull the graphics card straight out of the slot.
It’s important to avoid any twisting or bending motions, as this can cause damage to the card or the slot. With the GPU removed, you can proceed with any necessary upgrades or maintenance. Just remember to engage the locking mechanism when reinserting the card to ensure a secure fit.
By following these steps, you can safely and easily remove your GPU without any complications.
Gently remove the graphics card from the PCIe slot
Removing the GPU If you’re upgrading your computer’s graphics card or troubleshooting an issue, you’ll need to know how to properly remove a GPU from its PCIe slot. First, turn off your computer and disconnect all cables from the unit. Then, open the case and locate the graphics card.
It should be in a PCIe slot on the motherboard. Gently push the release lever or unlock button to loosen the GPU from its slot. Then, carefully pull the card straight up out of the slot, using even pressure on both sides.
Be careful not to apply too much force or bend the card. Once you’ve removed the graphics card, it’s essential to handle it with care and store it in a safe place to avoid damage. By following these simple steps, you can successfully remove your GPU without causing any damage to your hardware.
Final steps
Removing a graphics card from a motherboard may seem like a daunting task, but it’s actually quite simple once you know the steps. First, make sure your computer is turned off and unplugged from any power sources. Next, locate the graphics card on your motherboard and gently push down on the release latch or screws holding it in place.
Once the latch or screws have been released, carefully pull the graphics card out of its slot. It’s important to be gentle and avoid bending or breaking any components. If your graphics card has additional power connectors, make sure to unplug them before removing the card completely.
Now that your graphics card has been safely removed from your motherboard, you’re ready to install a new one or make any necessary repairs. Remember to handle your computer components with care to prevent any damage or malfunction.
Put back the side panel of the computer case
After successfully completing all the necessary upgrades or repairs on your computer, the final step is to put back the side panel of the computer case. This panel not only provides a sleek appearance but also protects the interior components from dust and debris. Before putting it back, make sure to check for any loose cables or connectors that may interfere with the panel’s alignment.
Slowly and carefully slide the panel back into place and secure it with the screws or snaps provided. Once the panel is secured, power on your computer and make sure everything is running smoothly. Congrats! You have successfully completed your computer repair or upgrade.
Plug in the computer and power it on
So you’ve made it to the final steps of setting up your computer! The next thing you need to do is to plug in the computer and power it on. This might seem like an obvious step, but it’s important to make sure you’ve properly connected all of the cables and cords before turning on your computer. Start by plugging in the power cable to an outlet and then connecting the other cords to the appropriate ports on your computer.
Once everything is connected, press the power button and wait for your computer to start up. Depending on your computer’s operating system, you might need to enter your login credentials or go through some setup steps before you can start using your computer. And that’s it! You’re now ready to start exploring and enjoying all the amazing things your computer can do for you.
So go ahead and get started, and don’t forget to save your work regularly!
Conclusion
Removing a graphics card from a motherboard might seem like a daunting task, but fear not! With a little bit of patience, a steady hand, and some common sense, you’ll have that pesky graphics card out in no time. Remember to be gentle with your hardware, and don’t be afraid to give it a little wiggle if it’s stuck. And if all else fails, just remember: sometimes you don’t need a graphics card to have a good time – just a trusty old pair of dice and a game of Dungeons and Dragons.
“
FAQs
What tools do I need to remove a graphics card from a motherboard?
You will need a screwdriver, preferably a Phillips head, to remove the screws holding the graphics card in place on the motherboard.
Can I remove my graphics card without unplugging my computer?
It is not recommended to remove the graphics card without unplugging the computer first. This is a safety precaution to avoid damaging the hardware.
How do I know if my graphics card is compatible with my motherboard?
Check the motherboard’s specifications for the type of graphics card it supports. You can also check the graphics card’s specifications for compatibility with your motherboard.
What do I do if my graphics card is stuck in the motherboard?
First, make sure all screws holding the graphics card in place are removed. Then, gently wiggle the graphics card back and forth to loosen it from the slot. If it still won’t budge, consult a professional for assistance.