
Have you ever experienced your computer motherboard failing and leaving you clueless as to what went wrong? If you have, you know how frustrating it can be. A malfunctioning motherboard can disrupt your entire system and cost you both time and money, especially if you have to take it to a repair shop. But what if you could diagnose the issue yourself? That’s where a multimeter comes in handy! With the right tools and a little know-how, you can use a multimeter to diagnose motherboard issues safely and effectively.
In this blog, we’ll discuss everything you need to know about diagnosing motherboard problems with a multimeter so that you can get back to using your computer quickly and without breaking the bank.
Tools needed
If your computer isn’t powering on, it could be due to motherboard issues. One of the easiest ways to diagnose problems with your motherboard is by using a multimeter, which allows you to check for power flows and connections. You’ll need a few tools to get started, including a multimeter with probes, a flathead screwdriver, and a manual for your motherboard.
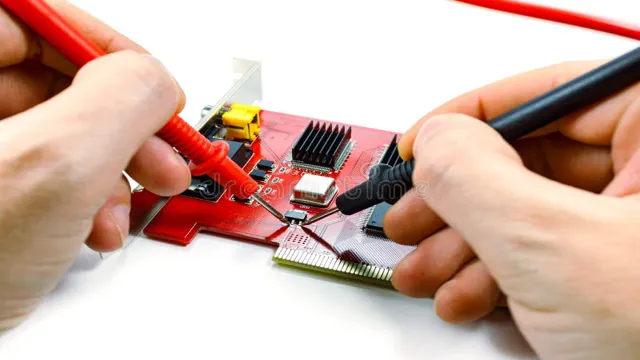
Begin by unplugging your computer from any power source and opening up your case. Use the screwdriver to remove your motherboard from your case, and then place it on a static-free surface. Once your motherboard is isolated, use your multimeter to check the power flows and connections by touching the probes to specific points on the board.
If you’re unsure of where to check, consult your motherboard manual for a detailed layout of its components. By following these steps, you’ll be able to determine the root cause of your computer’s motherboard issues and take steps to resolve them. Don’t forget to exercise caution when working with a multimeter, as it can be dangerous if not handled correctly.
Multimeter, motherboard manual, grounding wristband
As a computer technician, having the right tools is crucial to get the job done efficiently and effectively. One of the essential tools in your arsenal is a multimeter. This versatile device helps you with a wide range of tasks, from troubleshooting power supply issues to testing voltages and resistance of individual components.
Another crucial resource is the motherboard manual. Referencing this document can help you navigate complex motherboards, identify individual components, and verify necessary connections. But, before you start handling sensitive electronic components, it’s essential to wear a grounding wristband.
This small investment can protect your equipment from static electricity by grounding you and preventing any uncontrolled discharge. Taking the time to have these tools at your disposal can help you avoid damage to your equipment and ensure that your work is of the highest quality.
Identify Power Rails
To diagnose motherboard problems using a multimeter, the first step is to identify the power rails. The power rails are essentially the different voltage levels that power different components on the motherboard. Every motherboard will have various power rails, each delivering a specific voltage level to different parts.
To identify the power rails, you can reference the motherboard’s schematics or consult the user manual. Once you have identified the power rails, you can use a multimeter to measure the voltage levels of each rail. This can help you diagnose any issues related to power or voltage such as malfunctions that cause crashes or unexpected reboots.
By identifying the power rails and measuring their voltage levels, you can get a better understanding of any issues that might be causing your motherboard to malfunction.
Locating location power pins
When working with a printed circuit board (PCB), identifying power rails is crucial for ensuring that the board functions as intended. Power rails are essentially the pins on a board that supply power to its components. Typically, power rails are marked by labels such as VCC, VDD, or +5V.
However, in some cases, these labels may not be present or may be difficult to locate. In such cases, it becomes important to visually inspect the board for any large components such as capacitors or voltage regulators, and trace their connections to identify the power rails. By following this process, you can identify the power rails and ensure that they are properly connected, thereby preventing potential board failures.
So, remember to keep an eye out for these key components when trying to locate the location power pins of a PCB!
Setting Multimeter
Diagnosing a motherboard issue can often be a tricky task, but with the use of a multimeter, it’s possible to determine the root cause. First, it’s important to understand the voltage requirements of the motherboard’s components. Check the manual or website for the specific component you’re testing for voltage requirements.
Once you have this information, you can use the multimeter to test for continuity, voltage, and other electrical properties. Make sure to test all components, including power supplies, ports, and the motherboard itself. If the multimeter indicates that there is no voltage or continuity, then it’s possible that the component is faulty and needs to be replaced.
It’s worth noting that diagnosing motherboard issues can be complex, and it’s always important to consult a professional if you’re unsure about the process. By using a multimeter, you can save time and money by determining the issue before going to a professional repair service.
Fluke Multimeter setting, voltage and resistance mode
When using a Fluke multimeter, it is important to set it up properly for accurate readings. First, make sure the dial is set to the appropriate function, such as voltage or resistance mode. To measure voltage, the black lead should be connected to the common or black socket, and the red lead should be connected to the voltage or V socket.
Make sure the leads are securely connected to the circuit you are testing. To measure resistance, first turn off power to the circuit and disconnect any power source. Then, touch the two leads together to ensure the multimeter is reading 0 ohms, and connect the leads to the circuit you are testing.
With proper setup, your Fluke multimeter can provide accurate readings for all your electrical testing needs.
Testing Single Pin
To diagnose a motherboard with a multimeter, it’s essential to test single pins first. Start by identifying the motherboard’s reset switch and locating its corresponding pin on the motherboard. With the multimeter in continuity mode, connect one probe to the pin and the other to the ground.
If a beep is heard, the reset switch is functioning correctly. Repeat this process for other pins, such as the power switch, HDD LED, and power LED, to ensure all essential pins are functional. This process will help you identify which specific pins are causing issues and enable you to make necessary repairs or replacements.
Remember to take appropriate anti-static precautions and consult the motherboard manual to locate the specific pins and their functions. By following this process, diagnosing and repairing a malfunctioning motherboard can be much simpler and faster.
Touching multimeter probes and checking continuity
When using a multimeter, one of the most basic tests you can perform is checking the continuity of a single pin. To do this, start by setting your multimeter to the continuity or resistance setting, and then touch the probes together to ensure you are getting a reading of 0 ohms. Next, touch one probe to the pin you want to test and the other probe to a ground point.
If the pin is electrically connected to the ground, you should again see a reading of 0 ohms, indicating continuity. If the multimeter shows infinite resistance, or no continuity, the pin is not connected to ground and you may need to inspect the circuit further. Remember to always exercise caution and use proper safety measures when using a multimeter, including avoiding touching the probes together while the meter is on and using appropriate personal protective equipment.
Testing Multiple Pins
If you suspect that your motherboard is malfunctioning and causing issues, there are a few steps you can take to diagnose the problem using a multimeter. One of the most effective methods is testing multiple pins on the motherboard to see if they are receiving the correct voltage. Start by identifying which pins you want to test, typically the power supply unit (PSU) pins and the CMOS battery pins.
Use the multimeter to measure the voltage at each pin, comparing the reading to the expected voltage. If the voltage is too high or too low, it may indicate a problem with the motherboard or the PSU. However, be sure to check the motherboard manual or manufacturer’s website for the correct voltage specifications before testing.
Diagnosing issues with a motherboard can be a challenging task, but using a multimeter to test multiple pins can provide valuable insights and help you narrow down the problem.
Measuring voltage outputs
When it comes to testing multiple pins for voltage outputs, there are some important factors to consider. One of the most significant things to keep in mind is accuracy. Different pins may produce different voltage levels, so it’s important to have a precise measuring tool to ensure accurate readings.
Another important factor is consistency. When testing multiple pins, it’s essential to follow the same testing procedure for each pin to ensure consistency in readings. Additionally, it’s important to record all of your readings in a clear and organized manner to easily compare and analyze data.
By following these tips, you can effectively test multiple pins for voltage outputs and gather accurate and reliable information.
Interpreting Results
If your computer is having issues starting up, it could be a problem with the motherboard. In such a situation, you can use a multimeter to diagnose the motherboard and determine the root cause of the issue. Begin by identifying the power supply connectors on the motherboard and test the voltage on each connector.
A motherboard that’s functioning properly should show a voltage reading of approximately +5 volts. However, if there is no voltage or a lower reading, it may indicate a faulty motherboard. Similarly, you can test the capacitors on the motherboard by setting your multimeter to the continuity setting and observing the readings.
If the readings show an open circuit or infinite resistance, this could imply a problem with the capacitors. To confirm the results, you can compare them with the manufacturer’s specifications for the motherboard in question. When interpreting the results, it’s necessary to have the requisite skills and knowledge to interpret the readings accurately.
Consider seeking the assistance of a professional if you’re unsure about the test results. By using a multimeter to diagnose motherboard issues, you can identify the cause of the problem and take steps to resolve it effectively.
Analyzing data and motherboard manual’s
When analyzing data and motherboard manuals, it’s essential to be able to interpret the results accurately. It can be a daunting task, but with the right approach, you can make sense of your findings and draw meaningful conclusions. One critical thing to keep in mind is that interpreting results requires both logic and creativity.
While logic helps you to understand the data itself and its statistical significance, creativity is what allows you to connect the dots and see the bigger picture. To avoid being overwhelmed by the sheer amount of data, it’s vital to break them down into smaller, more manageable chunks. Additionally, it’s crucial to pay close attention to the motherboard manual and its specifications.
Understanding the manual’s instructions and layout can help you better understand your data and the technical aspects of your system. By combining logical analysis with a creative approach and keeping the manual’s specifications in mind, you can turn raw data into valuable insights that can help you optimize your system’s performance.
Conclusion
In the world of computer repair, knowing how to diagnose a motherboard with a multimeter is a valuable skill to have. It may seem daunting, but with the right equipment and technique, you can narrow down the issue and fix it with ease. Remember to check for any visible damage, test the power supply, and use the multimeter to detect any faulty components.
With a little patience and perseverance, you’ll be able to save your motherboard and get your computer back up and running in no time. So, roll up your sleeves, grab your multimeter, and get ready to become the expert troubleshooter your computer deserves!”
Benefits of being able to use a multimeter to diagnose motherboard issues.
When it comes to diagnosing motherboard issues, a multimeter can be an invaluable tool. One of the key benefits of being able to use a multimeter is the ability to interpret the results you get. By measuring the voltage, resistance, and current in different parts of the motherboard, you can identify where the problem lies and take steps to fix it.
For example, if you notice that there is a drop in voltage in a particular circuit, it could be a sign of a damaged capacitor. On the other hand, if the resistance in a circuit is too high, it could indicate a broken connection. With a multimeter, you can pinpoint these issues with accuracy and take action to resolve them.
By interpreting the results you get, you can save valuable time and money by identifying the specific problem and fixing it quickly. So, if you’re looking to troubleshoot motherboard issues, a multimeter is an essential tool that can help you get the job done with ease.
FAQs
What are the common symptoms of a faulty motherboard?
Some common symptoms of a faulty motherboard include the computer not turning on, random shutdowns, blue screen of death errors, and malfunctioning USB/Firewire ports.
How can I use a multimeter to diagnose a faulty motherboard?
First, turn off the computer and unplug it from the power source. Then, locate the motherboard’s manual and identify the voltage points to be tested. Set the multimeter to the correct voltage range, touch the probes to the voltage points, and compare the readings to the manual’s recommended values.
Can a multimeter be used to diagnose all motherboard issues?
No, a multimeter can only diagnose issues related to power and voltage. Other issues like faulty components and firmware corruption require a more advanced diagnostic tool.
What should I do if my multimeter test results indicate a faulty motherboard?
If your multimeter test results indicate a faulty motherboard, you may need to replace it or seek professional assistance. It is also recommended to check other components like the power supply unit and RAM to rule out other possible issues.