
Is your Brother printer suddenly showing an error message indicating that the drum has stopped? If so, you’re not alone! This issue can be frustrating, especially when you’re in the middle of an important printing job. But don’t worry, there are solutions to this problem. The drum unit is an essential component in the printing process, and it may need to be replaced after a certain number of prints.
However, there are other reasons why your Brother printer may be experiencing issues with the drum, such as wear and tear, lack of maintenance, or a malfunctioning component. In this blog post, we’ll explore the possible reasons why your Brother printer drum may have stopped and provide some tips on how to troubleshoot and fix this problem.
Check Drum Unit
If your Brother Printer has suddenly stopped printing, the first thing you should do is check its drum unit. The drum unit plays a crucial role in the printing process, as it’s responsible for transferring the toner onto the paper. Over time, the drum unit can wear out and become damaged, causing printing issues such as smudging, streaking, or blank pages.
If your Brother Printer drum unit has reached the end of its life, you’ll need to replace it with a new one to continue printing. Don’t worry, though – replacing the drum unit is a quick and easy process that can be done in a matter of minutes. Simply locate the drum unit in your printer, remove it, and install the new one following the instructions provided in your printer manual.
By keeping an eye on your printer’s drum unit, you can prevent printing issues and ensure that your Brother Printer continues to produce high-quality prints for years to come.
Remove and Reinstall Drum
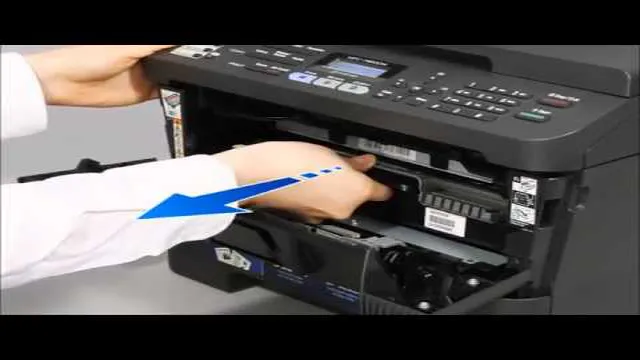
If you’re experiencing print quality issues, it might be time to check your drum unit. One of the first steps in doing so is to remove and reinstall the drum. This can seem intimidating, but don’t worry – it’s actually a straightforward process as long as you follow the manufacturer’s instructions and handle the drum carefully.
Before you start, make sure you have the replacement drum on hand. When you remove the old one, be careful not to touch the drum surface as this can cause damage. You’ll also want to avoid exposing the drum to bright light for an extended period of time, as this can affect the print quality.
Once you’ve removed the old drum, inspect it for any signs of wear or damage. If the drum looks fine, you may be able to reinstall it and continue using it. However, if you notice any issues like scratches, dents, or other damage, you’ll want to replace it with a new one.
Installing the new drum is simply a matter of reversing the steps you took to remove the old one. Again, be sure to follow the manufacturer’s instructions carefully and handle the drum with care. When you’re finished, run a test print to ensure everything is working properly.
Remember, proper maintenance of your drum unit can help ensure you get the best possible print quality and extend the life of your printer. So, don’t be afraid to take a few minutes to check your drum unit and replace it if necessary – your printer (and your wallet) will thank you!
Replace Drum Unit if Damaged
Keeping your printer drum unit in good condition is essential to ensure quality prints. Over time, the drum unit can get worn out or damaged, resulting in subpar printing performance. So, it’s important to check the drum unit for any signs of wear and tear periodically.
If you notice any scratches, dents, or blemishes on the surface of the drum unit, it’s time to replace it. Using a damaged drum unit not only produces poor-quality prints but can also damage the other components of your printer. So, it’s better to invest in a new drum unit rather than risking the cost of repairing your printer in the long run.
Make sure to follow the manufacturer’s instructions for replacing the drum unit and dispose of the old one properly. By keeping a check on the drum unit’s condition, you can prolong your printer’s lifespan and ensure a smooth printing experience. Remember, a little bit of maintenance goes a long way in enhancing your printer’s efficiency and producing excellent prints.
Clean the Printer Interior
If your Brother printer drum has stopped working, it is likely due to the accumulation of toner and dust particles on the inside of the printer. The drum is a critical component in the printing process, responsible for transferring the toner onto the paper. To clean the printer interior, start by turning off the printer and unplugging it from the power source.
Next, open the printer cover and carefully remove the drum and toner cartridge assembly. Using a soft, lint-free cloth, gently wipe down the inside of the printer, removing any excess toner or dust particles. Avoid using liquid cleaners or compressed air, as they can damage the delicate components of the printer.
Once you have finished cleaning, carefully reinsert the drum and toner cartridge assembly, making sure that they are securely in place. Finally, plug the printer back in and turn it on, and your Brother printer drum should be working properly once again.
Turn off Printer and Unplug
When it comes to maintaining your printer, it’s essential to pay attention to the interior components to ensure long-lasting performance. Firstly, turn off the printer and unplug it before you start any cleaning, making sure it’s safe to work on. The printer interior is prone to dust and debris accumulation, so it’s necessary to get into those tight spaces to clean it thoroughly.
Use a soft-bristled brush to gently remove the dust from the feed rollers, the platen roller, and the ink cartridge tray. Don’t use any liquids, such as water or alcohol, as this may damage the printer. Instead, use a dry lint-free cloth to wipe the surfaces clean.
Remember that this should be done periodically to keep your printer in top-notch condition. It’s better to maintain your printer regularly than to wait until it breaks down, which can be costly to repair. By following these simple steps, you can ensure your printer continues to produce high-quality documents and images every time you use it.
Remove Toner Cartridge
The printer interior can get dirty and dusty over time, which can affect the quality of your prints. To ensure that your printer works properly, it’s essential to clean its interior from time to time. One of the essential steps in cleaning the printer’s interior is removing the toner cartridge.
Before removing the toner cartridge, make sure that the printer is turned off and unplugged to avoid damage and ensure safety. Once you’ve removed the toner cartridge, use a soft, lint-free cloth to wipe down the inside of the printer. Pay particular attention to areas where paper dust and toner tend to accumulate, such as the paper path and the toner cartridge compartment.
Be careful not to touch the printer’s sensitive parts, such as the transfer roller or the imaging drum. Once you’ve cleaned the printer, replace the toner cartridge and turn on the printer to ensure that it’s working correctly. Remember to clean your printer’s interior regularly to keep it functioning at optimal levels.
Clean Drum and Roller
Keeping the interior of your printer clean is essential to maintain its optimal performance. One vital component of the printer that needs your attention is the drum and roller. These parts work together to transfer toner to the paper.
Over time, they can accumulate dust, toner residue, and debris, which can affect the quality of your printouts. To clean the drum and roller, start by turning off the printer and removing the toner cartridge carefully. Use a lint-free cloth to gently wipe away any debris or toner residues from the drum and roller.
Avoid using force and water which can damage these delicate components. Once you’ve cleaned the drum and roller, replace the toner cartridge and turn on the printer. You’ll notice a significant improvement in the print quality, and your printer will thank you for taking good care of it.
Remember to do this regularly to keep your printer running smoothly.
Reset Drum Counter
If you have a Brother printer, you might have come across the issue of the drum stop. Your printer will stop printing and notify you that the drum needs to be replaced. However, replacing the drum can be expensive and unnecessary at times.
This is where resetting the drum counter comes in handy. Resetting the drum counter will allow the printer to continue using the current drum until it actually needs to be replaced. To reset the drum counter, simply open the front cover of the printer and press and hold the “go” button for four seconds.
You will hear the printer’s screen blink twice, indicating that the drum counter has been reset. From there, close the front cover and you’re good to go! This quick and easy solution can save you time and money in the long run, so the next time your Brother printer notifies you that the drum needs to be replaced, remember to try resetting the drum counter first.
Manually Reset Drum Counter
If you’ve replaced the drum unit on your printer, you may need to manually reset the drum counter. The drum counter is a feature on many printers that keeps track of how many pages have been printed with a specific drum unit installed. Once the counter reaches a certain number, the printer will prompt you to replace the drum unit.
However, if you’ve just replaced the drum unit but haven’t reset the counter, you may continue to receive these prompts. To manually reset the drum counter, you’ll need to access the printer’s settings menu and locate the option to reset the drum counter. Each printer model may have a slightly different process, so it’s best to refer to your printer’s manual or manufacturer’s website for specific instructions.
Once you’ve successfully reset the drum counter, your printer should no longer prompt you to replace the drum unit.
Reset Using Control Panel
If you are having trouble getting your printer to work properly, it might be time to reset the drum counter. This can be done through the control panel of your printer. First, locate the “Settings” menu on your printer’s display screen.
From there, select “Maintenance,” and then “Drum Counter Reset.” Follow the on-screen prompts to reset the counter. This will clear the count of past print jobs and allow you to start using the printer as if it were brand new.
It’s important to note, however, that resetting the drum counter does not actually replace the drum unit itself. If your printer is still having issues after resetting the counter, it may be time to invest in a new drum unit. Keep in mind that regular drum maintenance can help prolong the life of your unit and prevent the need for frequent resets.
With a little bit of care and attention, you can keep your printer running smoothly and producing high-quality prints for years to come.
Contact Customer Support
If you’re encountering the “brother printer drum stop” error, don’t panic! It can be frustrating, but the good news is that there are solutions available to resolve the issue. One of the first steps you should take is to contact Brother’s customer support team. They have a team of experts who can assist you in troubleshooting the problem and provide you with technical assistance.
They may ask you to perform some tasks such as cleaning the drum unit or resetting the printer to its default settings. In some instances, the issue could be caused by a damaged drum unit, which would require replacement. Thankfully, Brother sells replacement drum units, which you can find on their website or through authorized retailers.
Don’t let this error stop you from using your Brother printer efficiently. Contact customer support today and get back to printing those documents without any hiccups.
Conclusion
In the world of printing, there are few things more frustrating than the dreaded “brother printer drum stop” message. It’s like a traffic jam on the information superhighway, bringing your productivity to a screeching halt. But fear not, dear users, for this is merely a reminder that your trusty printer drum needs a little TLC.
Give it a clean and a swap, and you’ll be back in business faster than you can say “toner refill”. So don’t let this drum stop you in your tracks, take it as a friendly nudge to show your printer some love and care.”
FAQs
What should I do if my Brother printer drum stops working?
First, try resetting the drum by removing it and reinserting it. If that doesn’t work, replace the drum with a new one.
How often should I replace the drum in my Brother printer?
It depends on your usage, but generally, Brother recommends replacing the drum every 12,000 pages or when you see a “replace drum” message on your printer display.
Can I clean my Brother printer drum instead of replacing it?
While you can clean the drum, it is generally not recommended. Even a small amount of damage or scratches on the drum can affect the print quality, and cleaning can be tricky without damaging the sensitive components.
How can I ensure that my Brother printer drum lasts longer?
Make sure to handle the drum with care, avoiding touching the sensitive components. Also, choose quality paper and avoid using paper that is too thick or too thin, as it can affect the drum’s lifespan. Regular maintenance and cleaning can also help prolong its lifespan.